
Universal fitting style for more than a decade emphasizes the charm of a female figure. It is considered to be the basic element of the wardrobe. And if an elegant sheath dress has not settled in your closet, it's time to rectify this situation.
Below are the patterns of different models of this style, which are sure to suit your taste.

Basky
It is enough to add one element to a classic dress, for example, a basque, so that it plays in a new way.
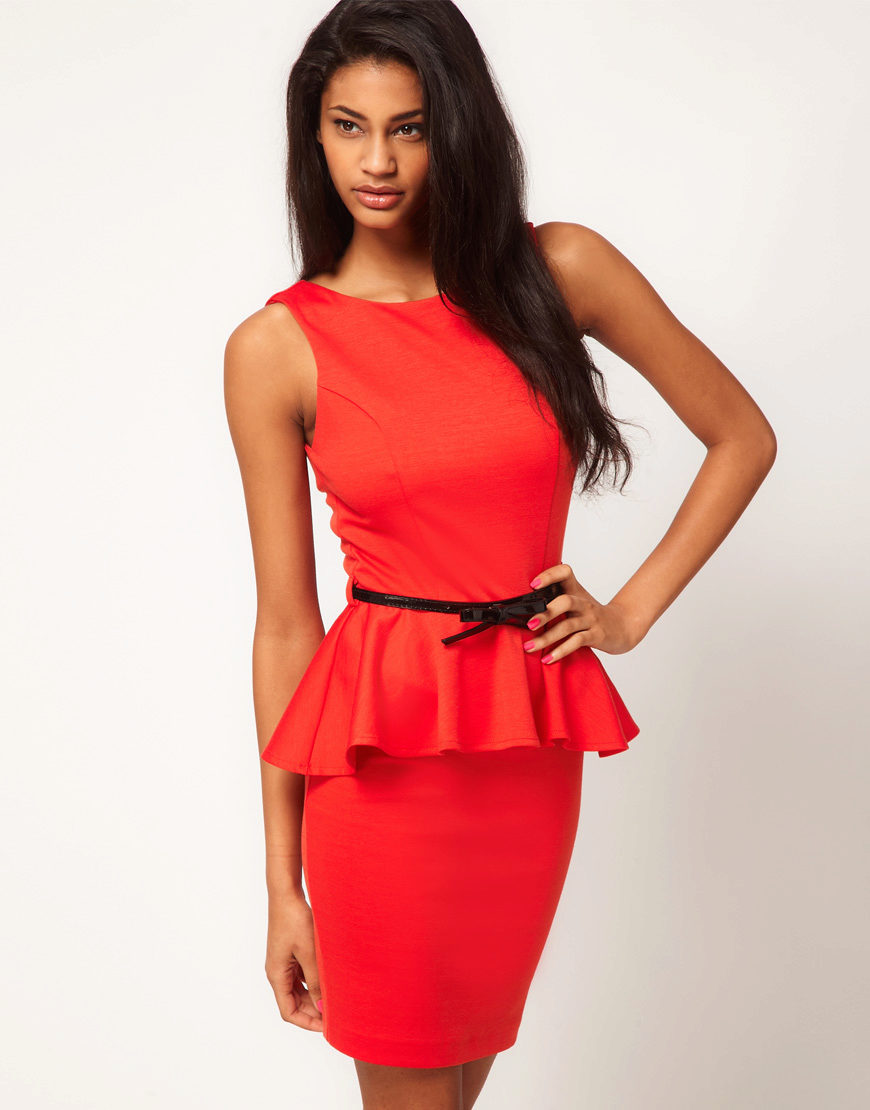
To model a fitting dress with a basky, you need a pattern-base, adjusted to your own standards, because the outfit is obliged to sit perfectly on the figure.
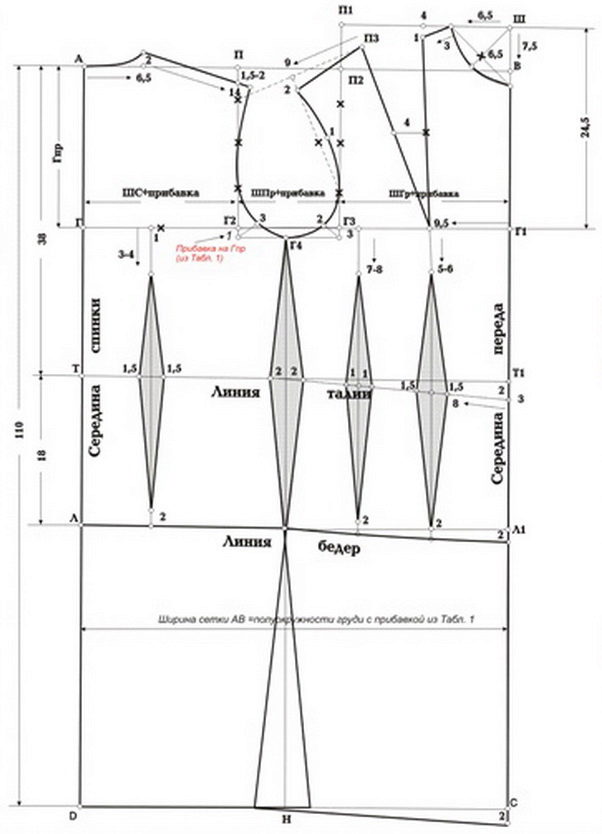
Only the upper part will be modeled, the skirt will remain classic, so the pattern is cut along the waistline:
- On the details of the waist line measure up to 3 cm and cut the belt. Tuck glue.
- Set aside 6 cm from the depth of the armhole line and draw a relief. Depending on the physique and desire, the number may vary. Understand how best to model the relief, you can, if you attach the pattern to yourself and put a dot at the mirror.
- Shift the waist thrusts and cut the front lines and the back along the created relief lines.
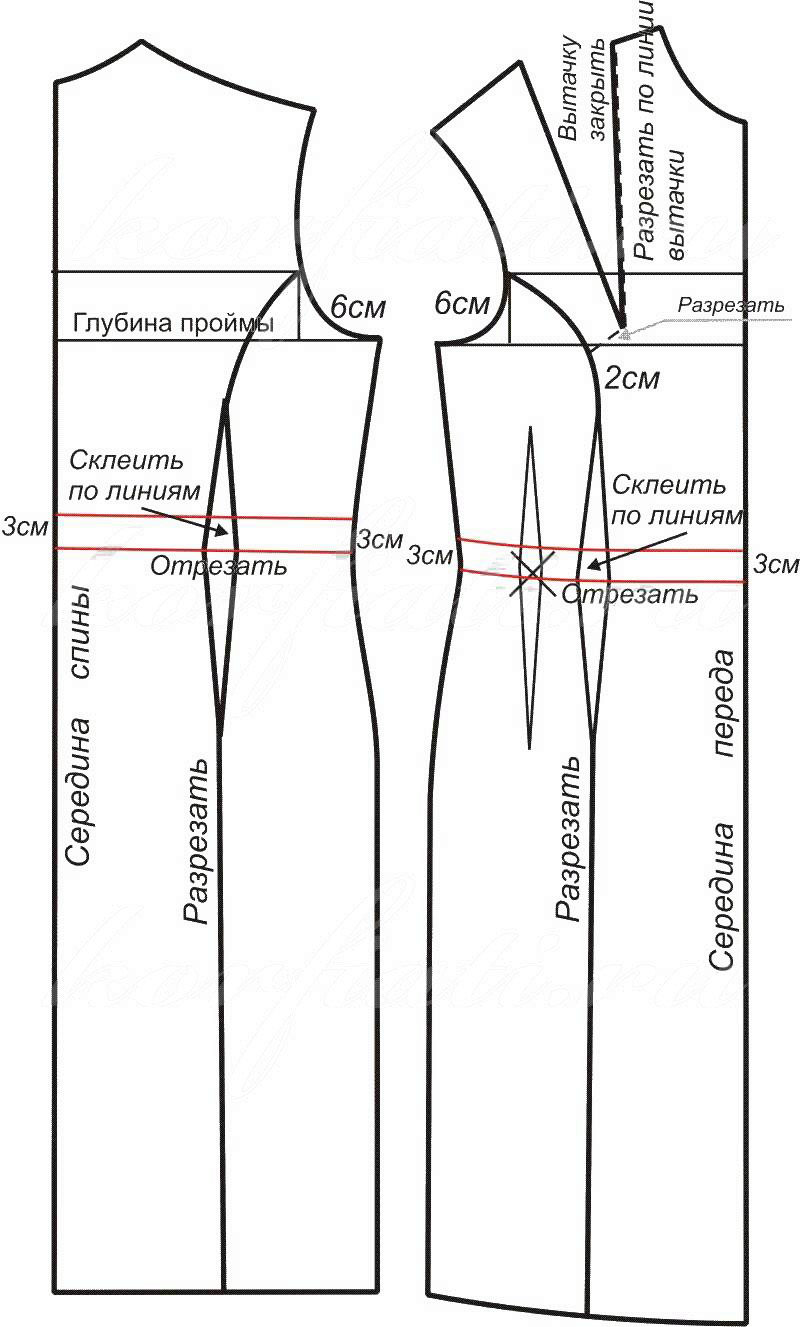
Shoulder tuck on the front of the bodice cut and close. A small tuck formed, which also close.
Model the armhole, putting 5 cm over the shoulder section from the neckline. Now draw new lines.

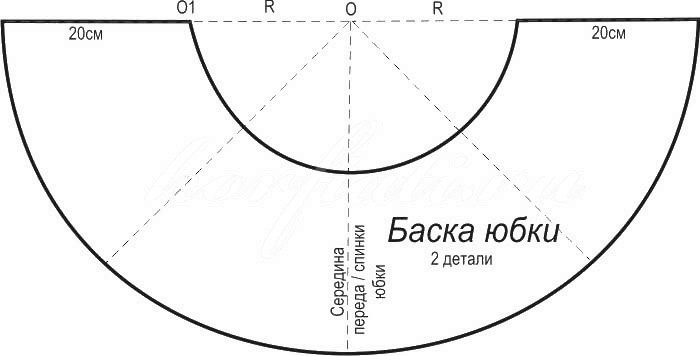
To simulate a basque, calculate the radius, which is equal to 1/6 waist circumference and build a semicircle. It remains to postpone the length of the part and hold the second semicircle.
Now cut the fabric and sew the dress.
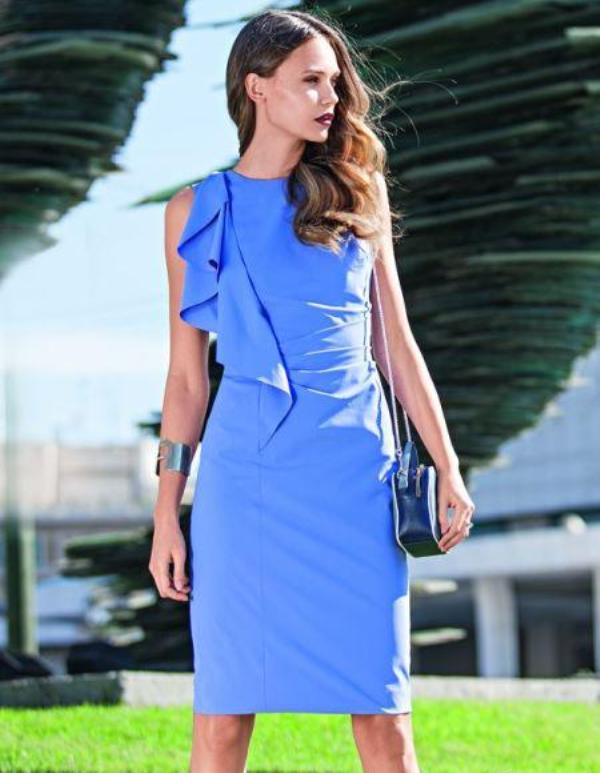
With shuttlecock
The fitting case will be significantly transformed due to the vertical fluffy shuttlecock with folds, fan-shaped at the waist.
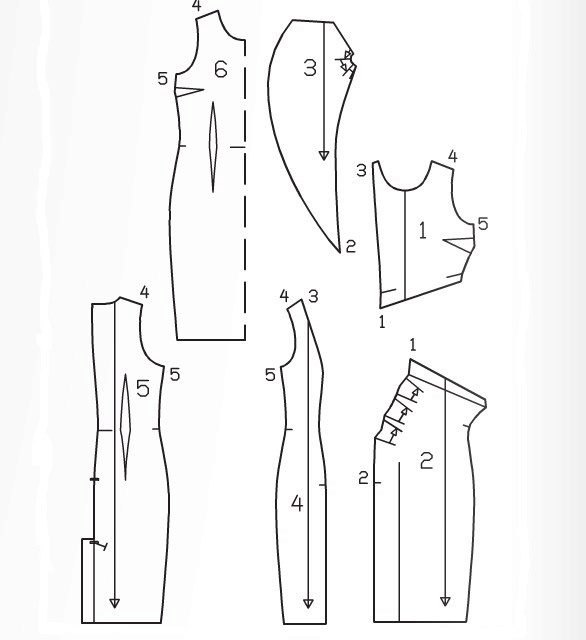
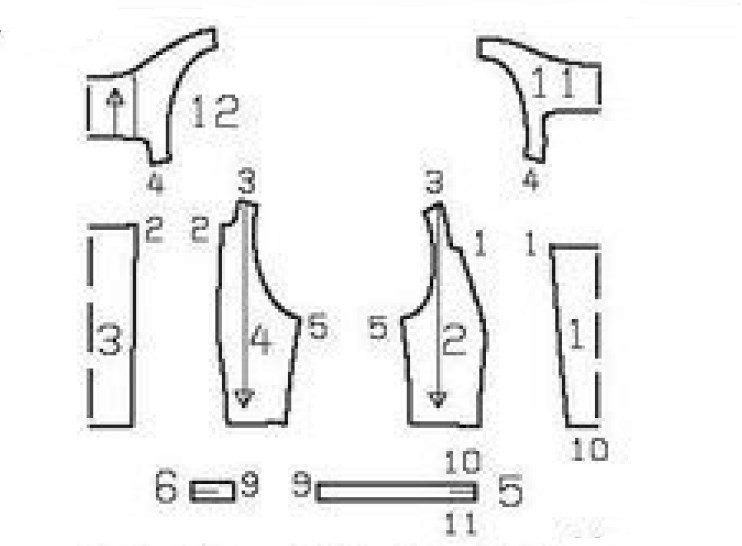
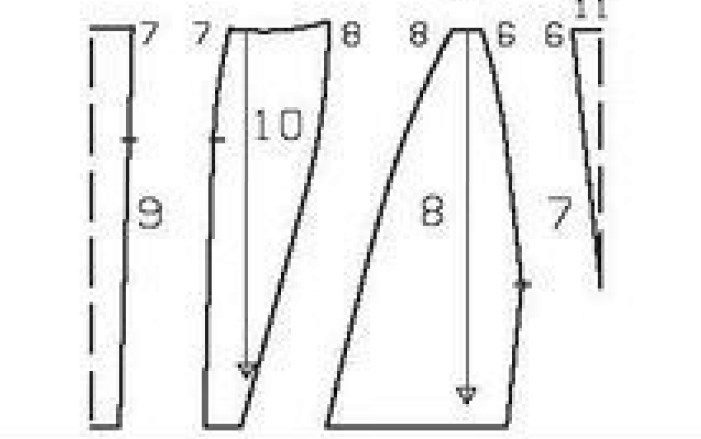
Sewing
- Details of the pattern, resize and increase to the desired size.
- At the top of the front (detail 1), stitch the chest dart, and at the bottom (detail 2), sew the folds from the wrong side, and then stitch the detail to the top.
- On the shuttle (det. 3) lay the folds. Put it on the right-hand cut face-to-face and sweep up to the marks. Short cut to sweep the shoulder section. Right side of the front (det. 4) stitched to the bodice.
- On the front of the lining (det. 6), sew the darts, then tack the part to the front of the main fabric.
- On the details of the back and pad (det. 5), stitch the darts and stitch a zipper. On the lining, perform the middle seam, leaving room for stitching the zipper.
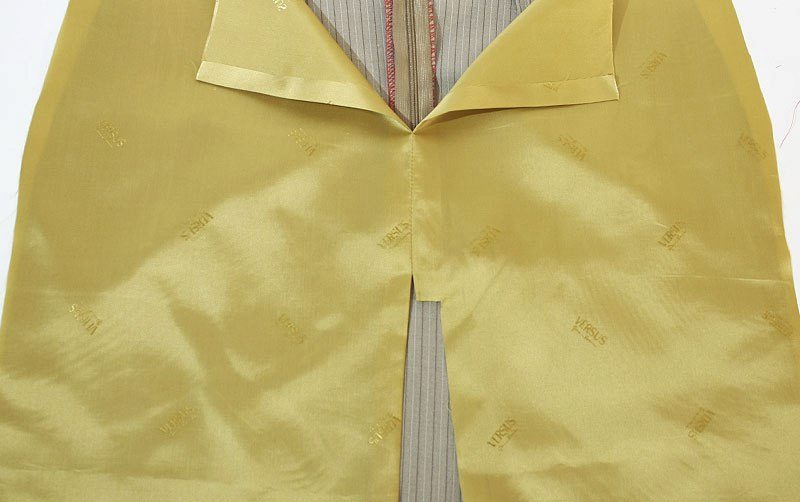
Processing slots
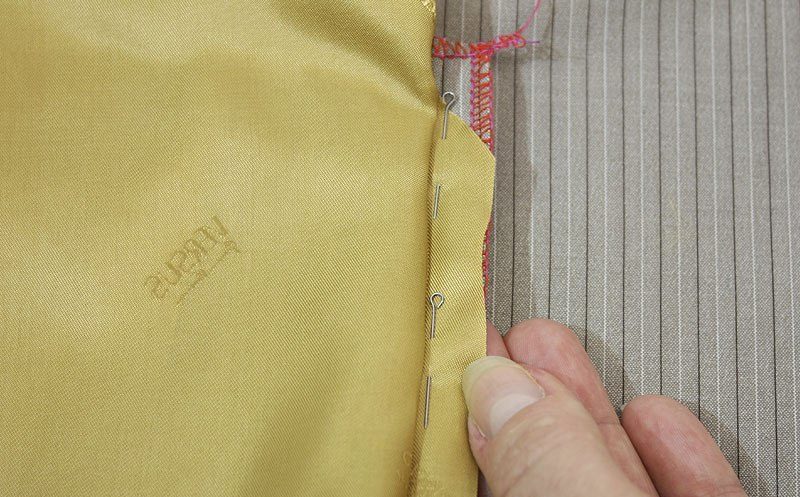
- From the spline mark to the zipper, make the middle seam.
- Sweep the spline along the seam line, smooth out the seam.
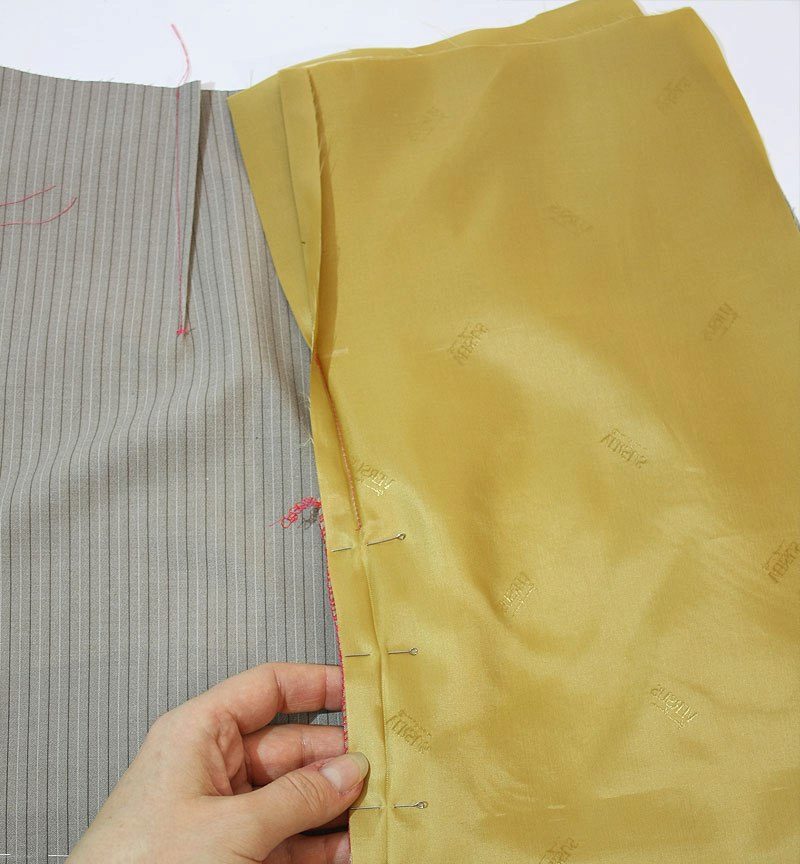
- To understand which side the slot should lie on, turn the part inside out and put the right side on the left. Secure the cut with a pin and turn the part over again.
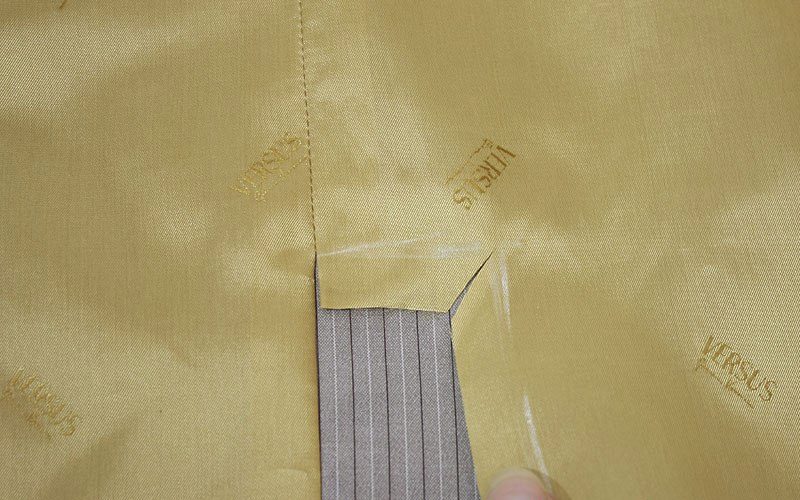
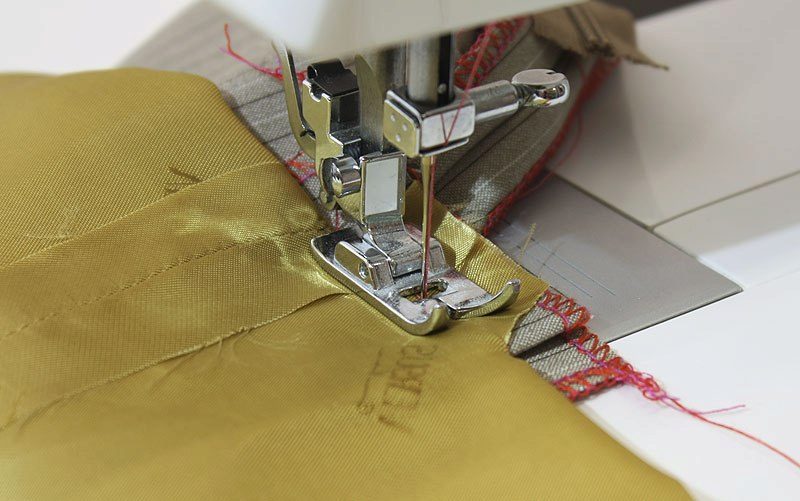
- Iron the slot on both sides, make a notch in the corner of the seam and lay a fastening stitch at the top.

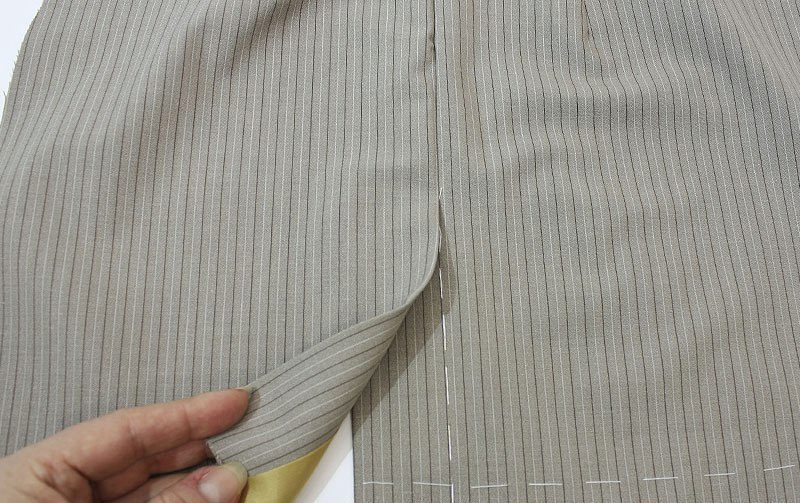
The slot is lined in this way:
- Left lining allowance tuck and iron. Bending it to the right side, pin the left seam allowance with pins and attach it.
- Allow the right side to fit in the corner. Allow tuck, iron and secure with pins.
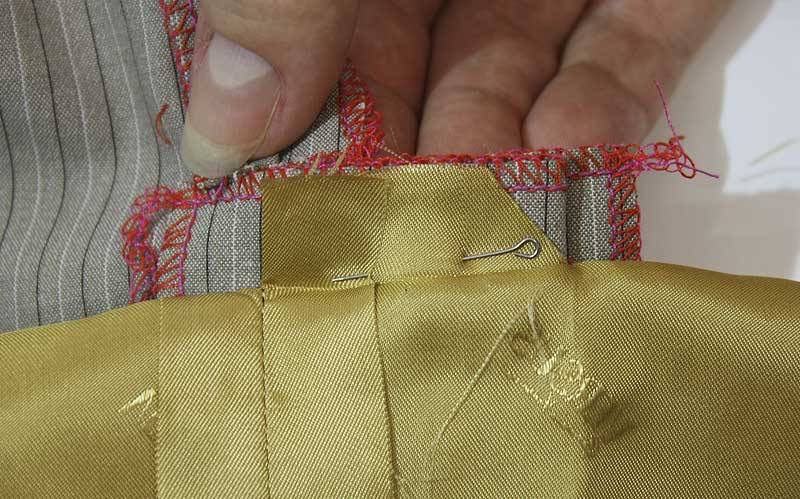
- Bend the lining on the left side and attach the right allowance, then bend down and sew the upper allowance.
Tuck the lining, stitch to the zipper and sew the dress.

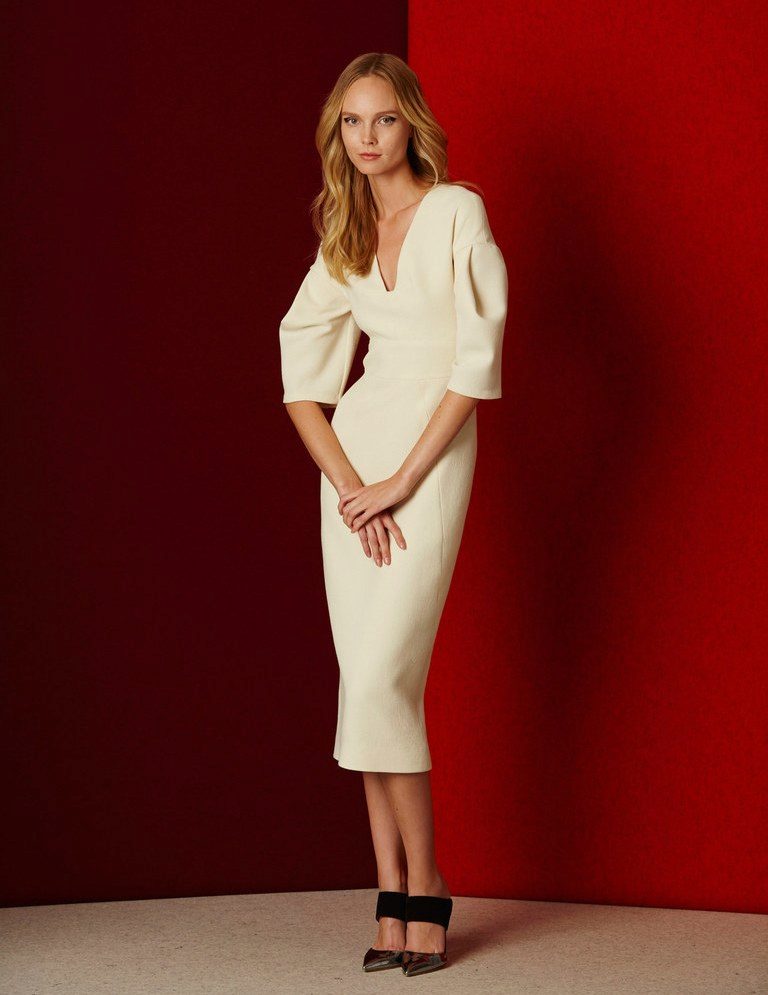
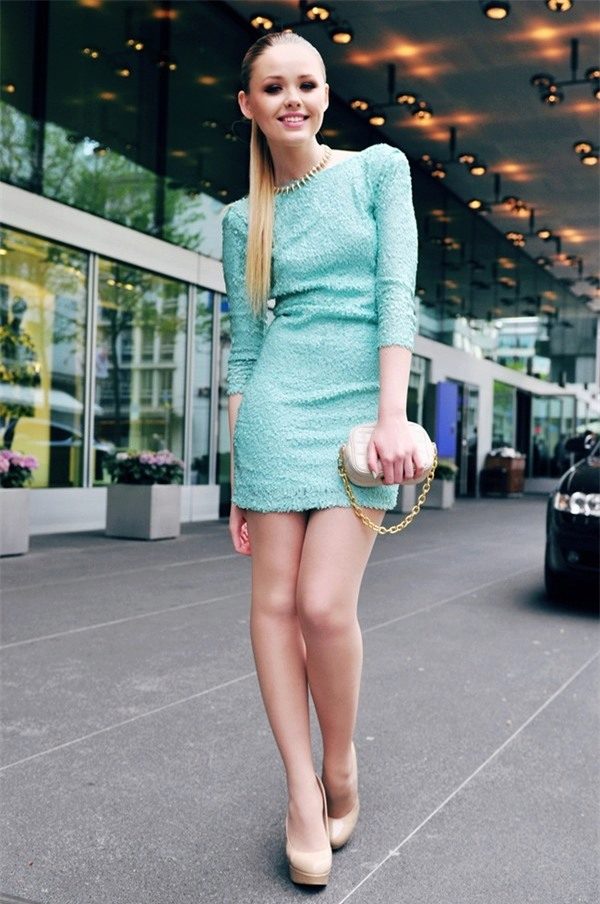
With sleeve
In the autumn and winter, cases with short and long sleeves are popular. Modeling and stitching such a model is not at all difficult.
- Cut the standard pattern on the front of the dress along the waistline.
- Move the dart on the skirt sideways.
- From the hip line down put it down 8 cm, then knot the skirt 1.5 cm. Make the length of the skirt from the waist at will. This also applies to the modeling of the neck.
- From the armhole set down 5 cm. From this point and to the center point of the chest, draw a line.
- Shoulder tuck close and create a chest.
On the back of the model, model the cut, deepen the neckline and deepen the skirt.
Shorten the sleeve or on the contrary lengthen.


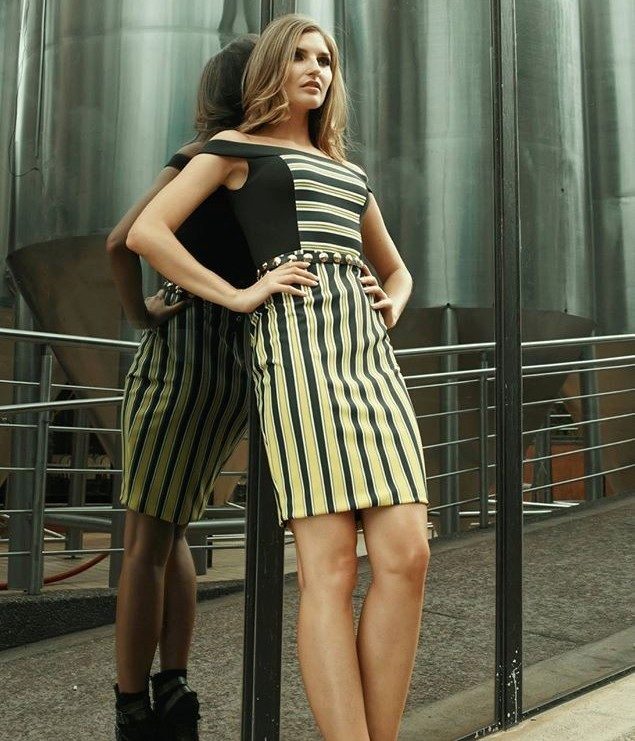
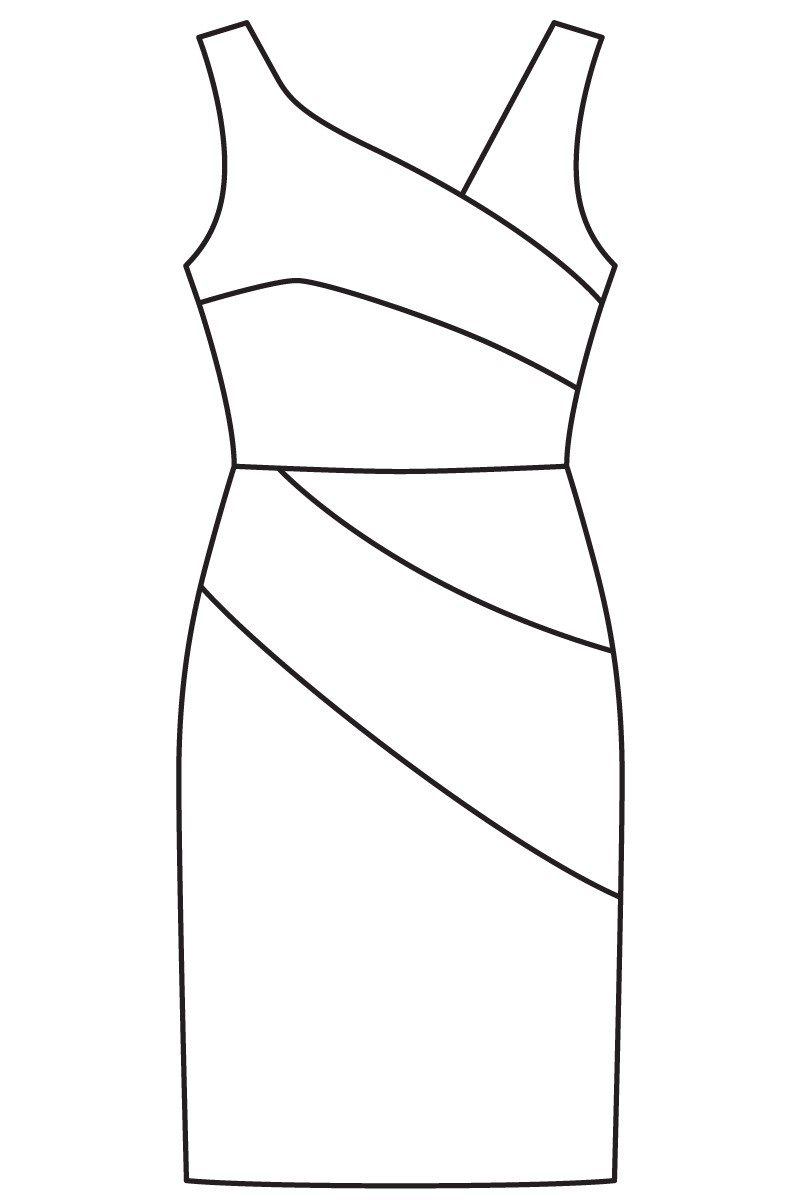
Asymmetrical
Contrast stripes - the easiest option to successfully correct the figure, making it visually slimmer.
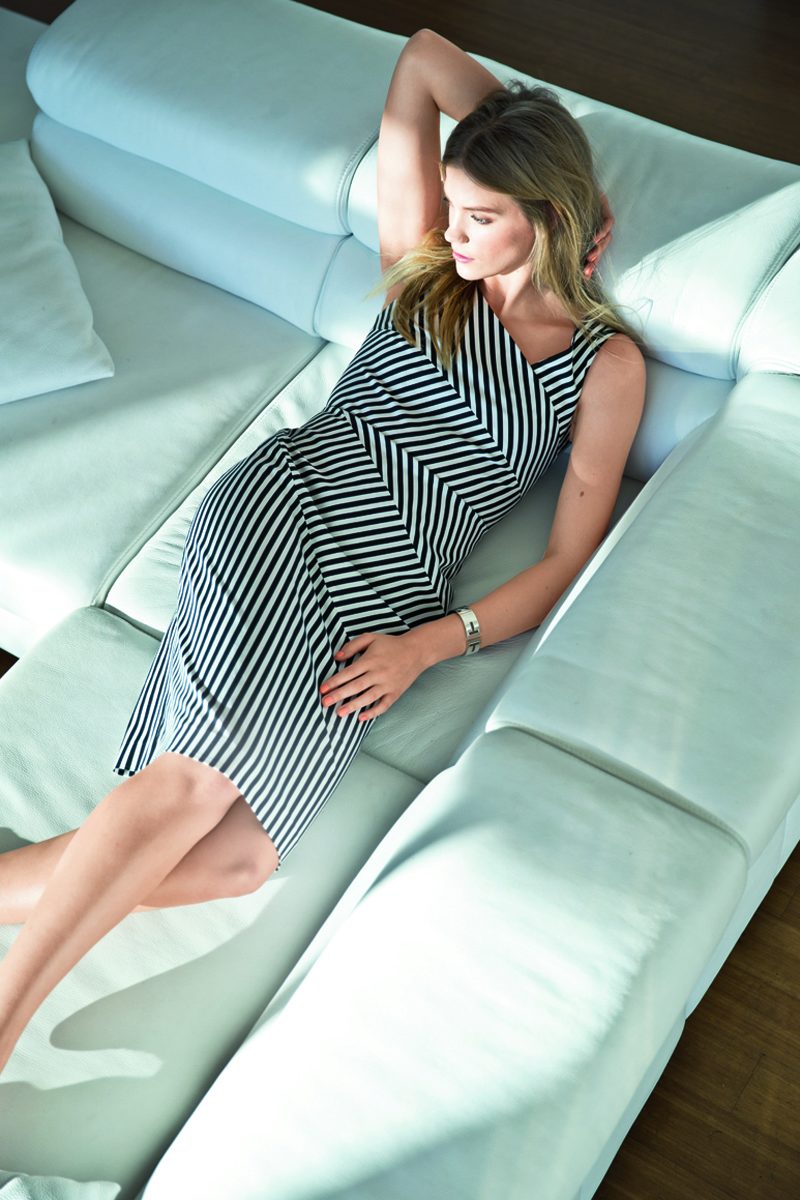
You will need gabardine in a strip, stretching in the transverse direction and a secret lightning. You can also choose bielastic fabric.
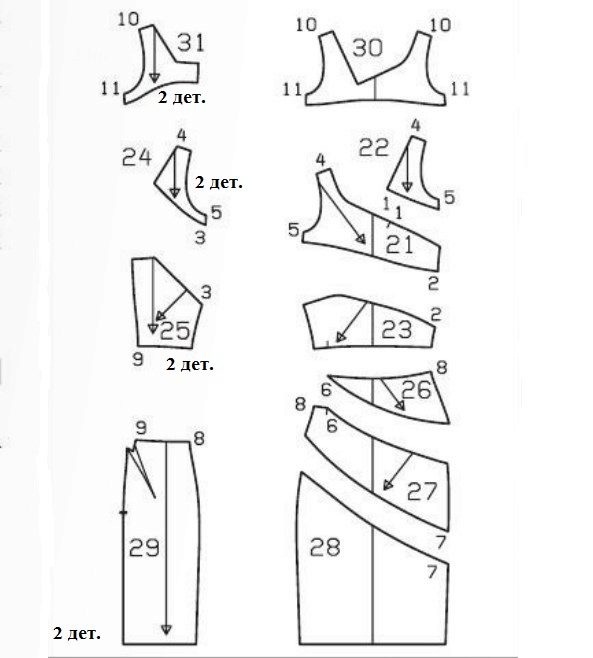
- Stitch the left yoke to the front (det. 22) and the lower part of the front bodice (det 23) to the upper part of the front bodice (det. 21).
- Coquette back (det. 24) stitch with the back of the bodice (det. 25).
- Perform side seams on the bodice of the dress.
- The upper part of the front panel of the skirt (det. 26) stitch off the middle part (det. 27) and the lower part (det. 28).
- On the back panels of the skirt (details 29), stitch the darts, then run the side seams.
- Skirt stitch with the top and sew a zipper.
- On facing front (det. 30) and back (det. 31), stitch shoulder seams and stitch to the front and back.
- Press down and sew the hem allowance.
Color Blocking
Contrast inserts and a slit on the skirt of the dress best highlight the benefits of the figure.

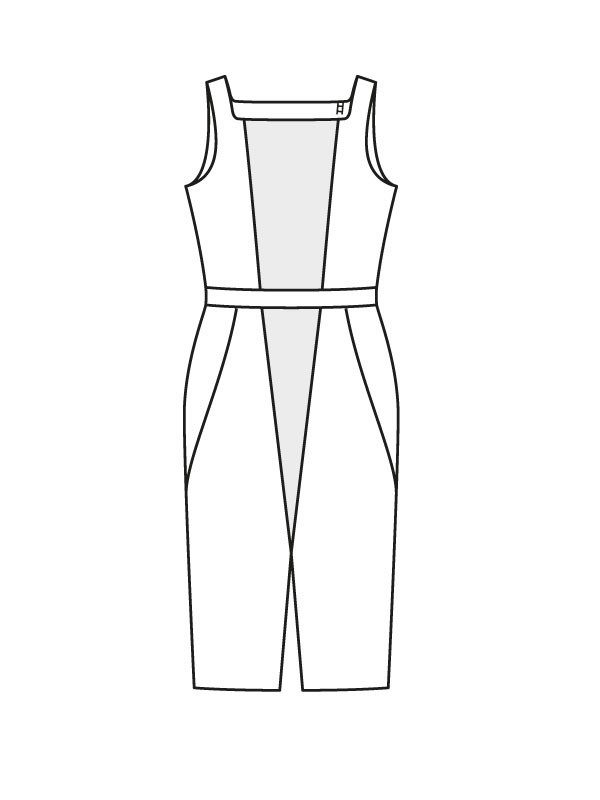
You will need a bi-elastic knitted two-faced fabric and a zipper 60 cm long.
- Fold the middle part of the front front fold (det. 1) with the side details (det. 2).
- Do the same with the details of the bodice of the back (det. 3 and 4), just stitch the zipper in the embossed cut of the middle and left side detail.
- Fold front and back folds (det. 11 and det. 12) pin to the bodice and stitch. Perform shoulder seams and stitch the side cuts on the dress and the facing.
- Middle of the front panel of the fold skirt (det. 7) stitch off the side parts (det. 8). Sew relief seams and on the details of the rear panel of the skirt (details 9 and 10), then run the side seams.
- Bend a set-in fold belt (det. 5) with the middle back of the set-in fold belt (det. 6) and stitch to the skirt and bodice
- Stitch the zipper to the incision, then follow the left relief seam from the bottom to the zipper.
- Make the bottom of the dress.
Regardless of whether you yourself model the pattern or use the finished one, the sheath dress should emphasize your virtues, thus becoming an indispensable option for all occasions.