
Sewing a dress is a whole series of steps that are thought out and measured 10 times, until the details are laid out on the table. And when it comes to evening dress, we proceed to the matter more scrupulously.
The complete process of creating an evening dress is difficult to fit into one article, but there are general guidelines applicable to each dress. Analyzing the main points in tailoring, let's take as an example the fitted model on the floor on one shoulder and sew a fashionable evening dress with a removable skirt.

Taking measurements
Since each girl has an individual figure, we need precise measurements in order for the dress to fit perfectly on the figure.
Standard measurements are half-cover waist, hips, chest, etc. Sometimes additional measurements are necessary, for example, to calculate the center of the chest or to make two measurements of the “Breast volume”.
Preparing the pattern
Having the necessary data, go to the creation of the pattern itself. It can be rewritten using graph paper or built in the program for the construction of patterns and print.

A few tips to prepare the pattern:
- Making sure that every detail of the dress (back, shelves, sleeves) is correct, it is transferred to a separate thick sheet of paper or cardboard from the main drawing.
- All the important lines of darts, notches, key points are also transferred.
- Before opening, be sure to check the details of the centimeter connecting sections. Side seams, shoulder sections should be the same. Make sure that the volume of the neck sleeve corresponds to the armhole. Take into account the stipulated folds.
- It is better to eliminate inconsistencies on paper than on fabric, so if they are found, cut off the excess, and add the missing centimeters with a piece of paper.
- If the pattern without allowances, be sure to make them on the fabric when cutting.
- Add to the seams and cut 1.5 cm each, along the longitudinal section of the top skirt cloth 3.5 cm, and on the bottom of the dress and the top skirt 4 cm.
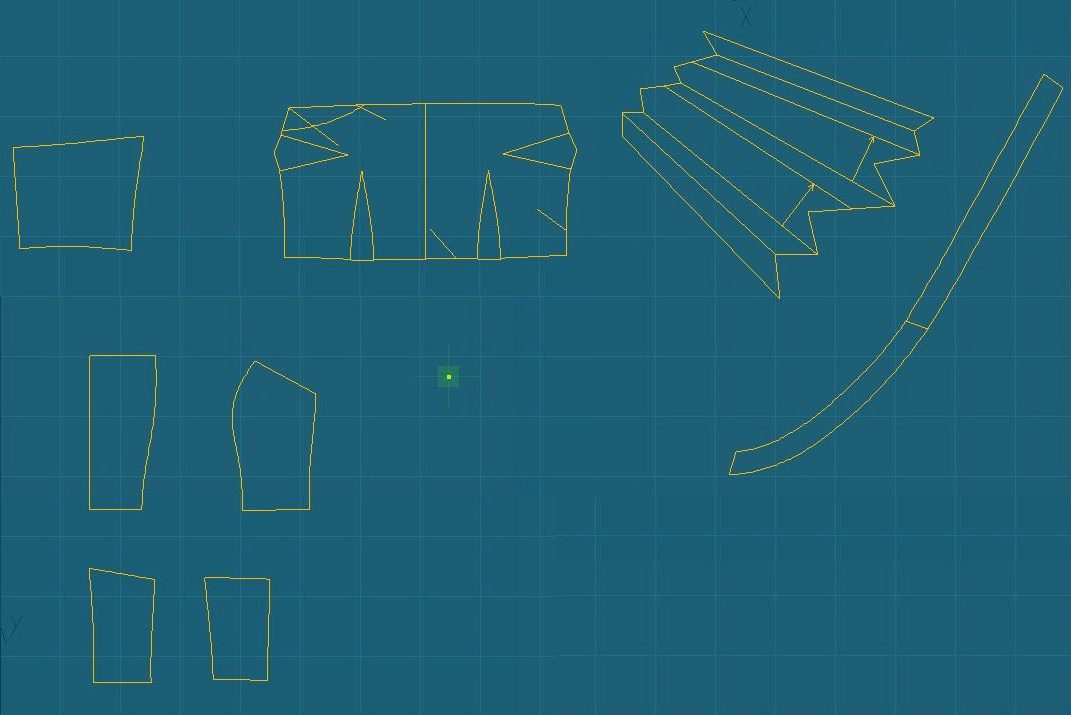
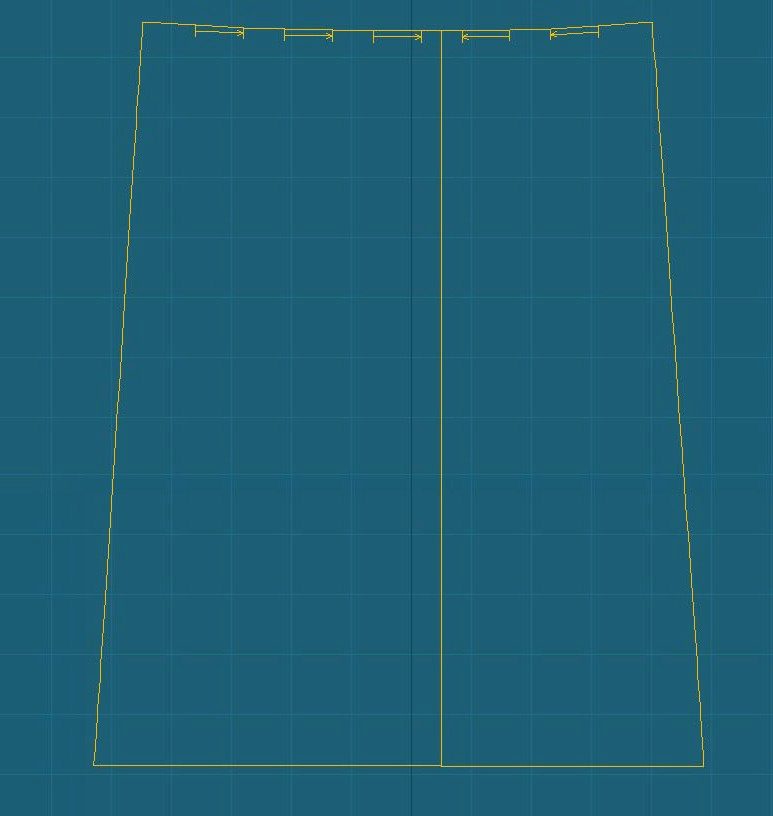
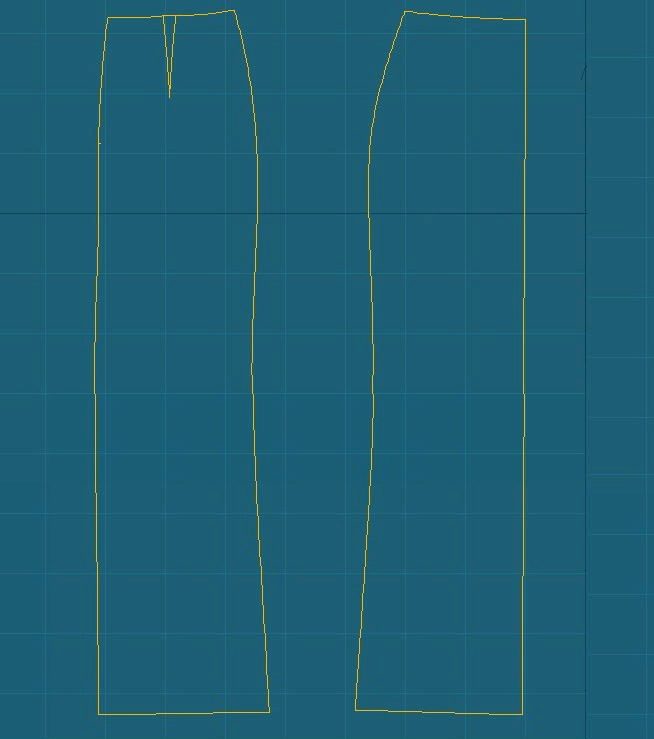
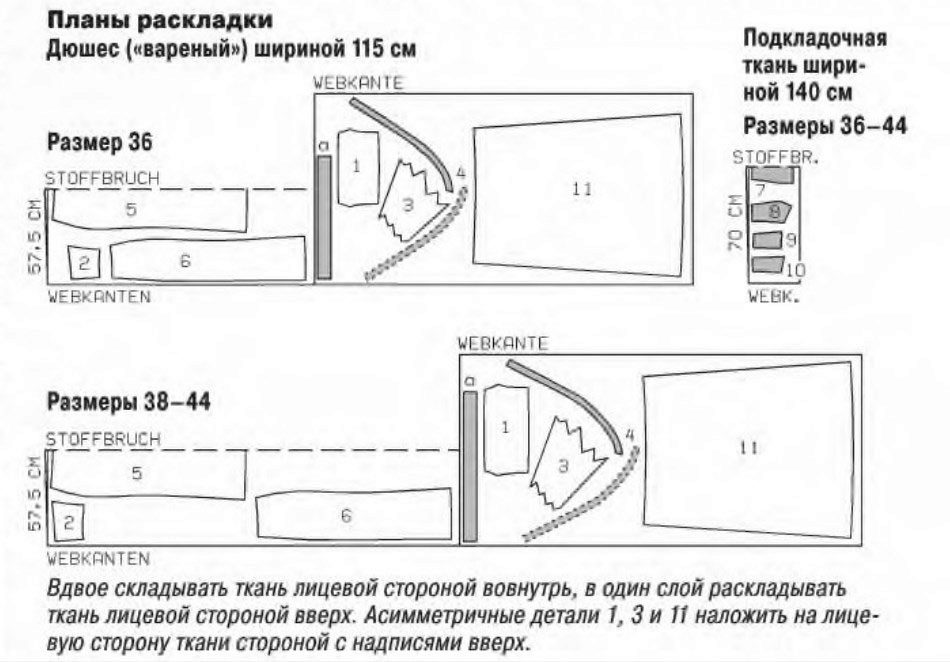
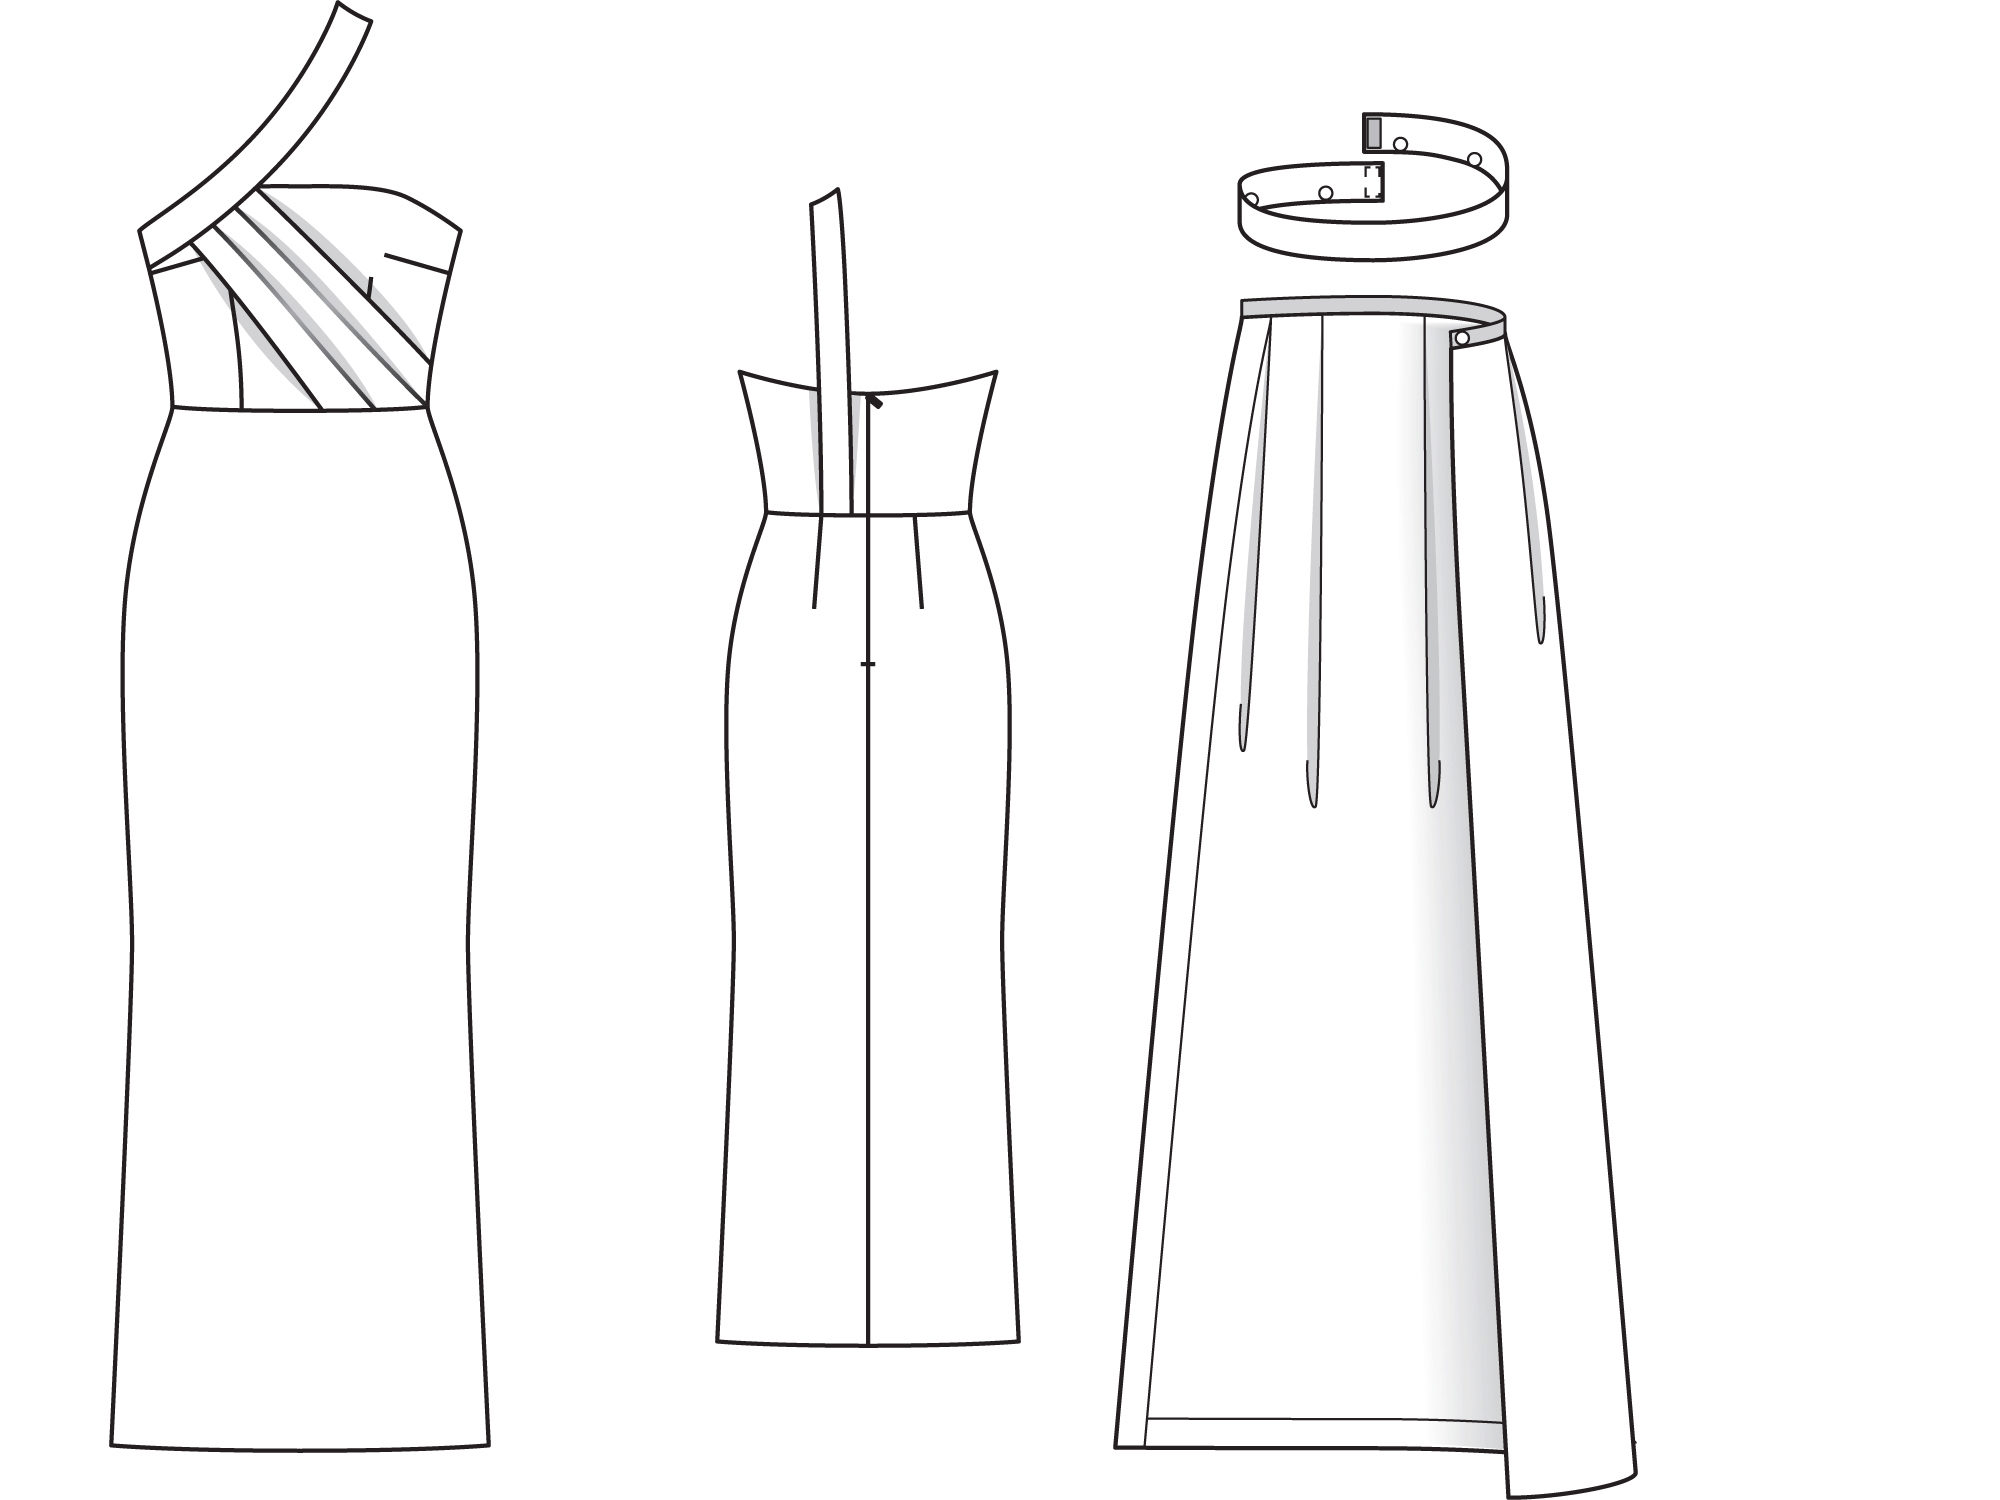
The pattern of our evening dress, built in the RedCafe program, as follows.
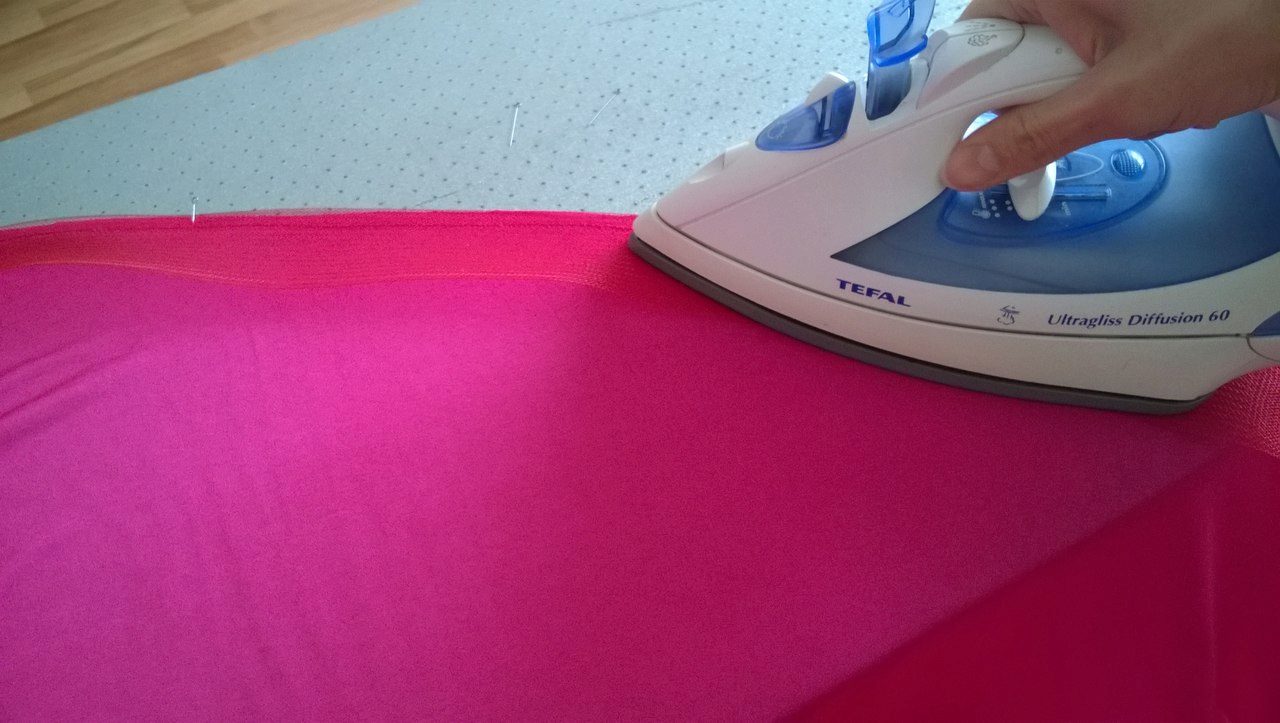
Fabric preparation
Fabric should be taken seriously. It will be a shame if the dress after the first wash sits or stretches.
- Cotton, linen and silk fabrics should be ironed from the seamy side. If the matter is skewed, it should be moistened and slightly pulled.
- Wool needs moist heat treatment.
- Be sure to inspect the acquired cut fabric. If you see flaws, circle them with soap to get around these defects when cutting.
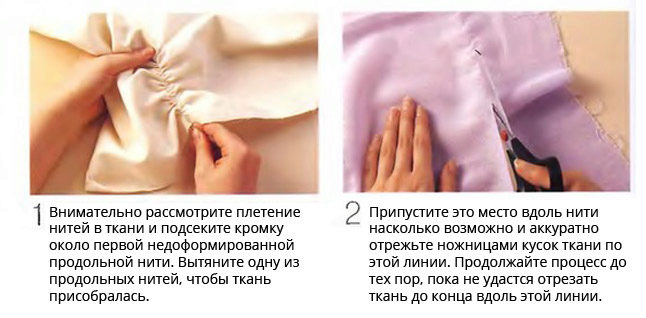
If the fabric is cut unevenly, then the edge needs to be leveled. To do this, pull the cross thread. A line will appear, which will show where the fabric should be cut.
On the matter with a pile or print, place and cut out the elements of the pattern so that the pile is in the same direction - down up. Exceptions are trim and belt.
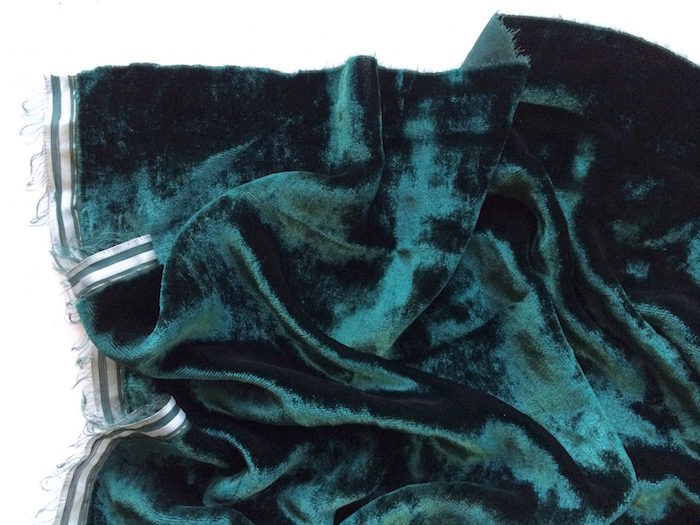
As for our evening dress with one strap, you will need dushes or well-shaped dress fabric.
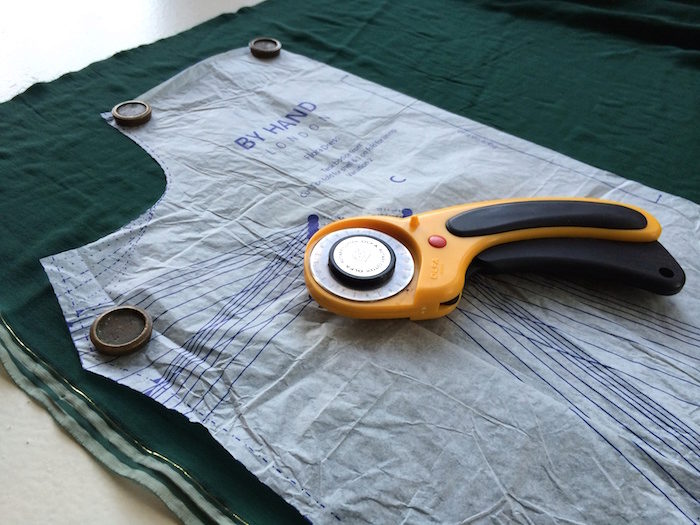
Layout and fit
- Lay the fabric face up.
- Make sure that the equity threads match the directions that are indicated on the details of the dress pattern.
- On the fabric, place large parts first, and between them - smaller, for example, belt, cuffs.
- The contours of the patterns are best described in two lines. 1st is the outline of the pattern, and 2nd is the allowance.
- The part is cut along the second line.

Cutting
Dig out details from dushes:
- front bodice - 1;
- backrest bodice - 2;
- finishing detail with folds - 1;
- straps - 2;
- fold front skirt - 1;
- rear flap skirt - 2;
- top skirt - 1;
- belt 8 cm wide (4 cm in finished form) and length depending on your size. For example, for the 36th, the length will be 74 cm, 78 cm - for the 38 size, etc. Of these, 3 cm - allowance for fastener.
One detail of the middle part of the bodice of the front with fold and 2 parts of the side and middle parts of the bodice of the back, and also 2 details of the side of the bodice of the front are cut out of the lining fabric.
Lining details duplicate interlining.
Sewing
- Sew darts on the front of the bodice.
- In the finishing part, fold the folds in the direction of the arrow marks and sweep down at the top and bottom. Folds do not press. Then tack on one-piece ruffles. Place the finished element on the bodice on the markup and tack open cuts.
- Sew the side details of the front and back of the lining with the central. Allow relief seams as a drawstring.
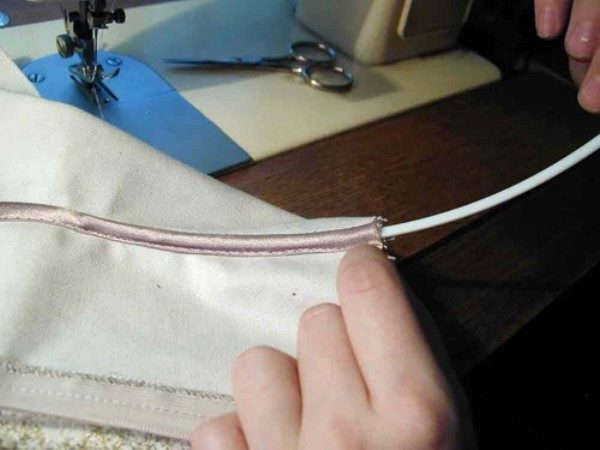
- Cut from ribbons with corsage sticks (regina) with a width of 7 and 11 mm and 2 segments of the desired length. The narrow regelin is designed for relief seams in front, wide - for the back. Stretch into the drawstring, then secure with stitching. The upper ends of the bands should lie 5 mm below the marked line of the upper edge.
- Details of the back and front of duchesse and lining stitch on the upper cut.
- Sew the strap. Its front end is placed on the front of the bodice from the right side cut, aligning the bottom edge with the marked alignment line. Sew the lower edge of the straps with hidden stitches. From the seamy side of the shoulder strap, sew it under the upper edge of the front bodice, without putting the needle on the front side.
- On the bodice of the dress, perform side seams. From a tape with corsage sticks 11 mm wide, cut 2 pieces of 18 cm each. Stamp them to the edge on the underside of the side seam allowances at a distance of 5 mm.
- Rear end of the straps sweep to the lower edge of the left part of the top of the back. Try on the dress's bodice and adjust the strap.
- Sew the darts on the back halves of the skirt, then the side seams. Combine the finished skirt with a bodice.
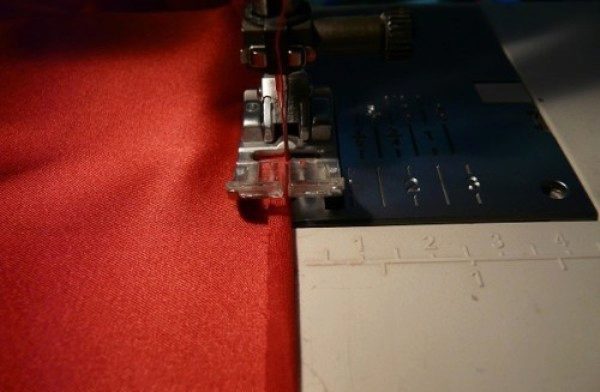
- Sew a secret zipper, while leaving the upper ends free. Make a middle seam on the back from the end of the zipper to the bottom. Twist the loose ends of the zipper and sew along with the allowances to the upper edge of the dress.
- Allow and hem allowance for hem.

Top skirt
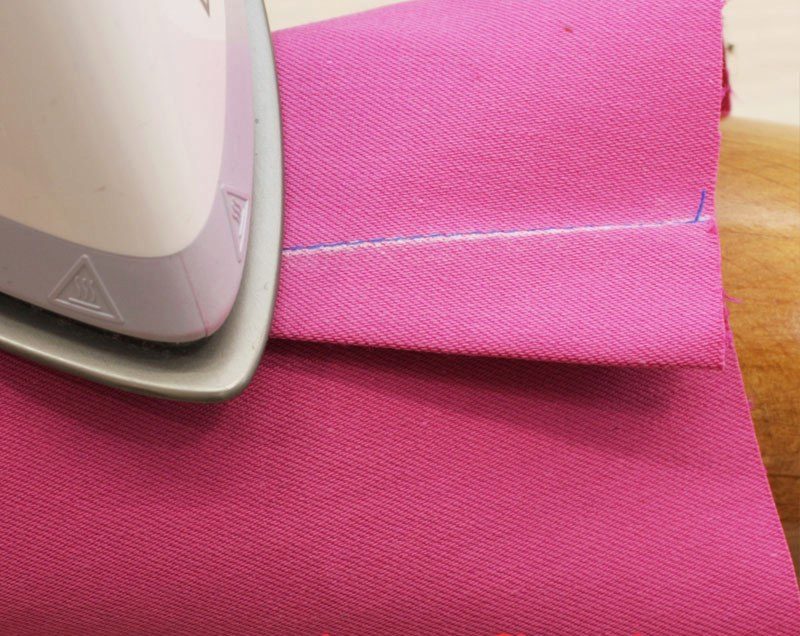
- Make the bottom of the removable skirt, first pressing the edges, and then sewed by hand. Side slices also press and scribe to the edge.
- At the top cut folds and sweep.
- Take a rep ribbon and one end of it tuck in 1 cm and iron. Measure from the bend, depending on the size of the length. Sew the ribbon to the upper edge of the removable skirt.

Belt
- Fold the belt in half and stitch the cuts, while leaving open a small area for eversion. Removing the belt, iron the edges. Then sew the open area. Belt close Velcro tape.
- Fix the skirt on the belt with buttons. Sew down the lower parts of the 5 buttons from the front side of the rep belt. On the 1st button sew on the ends of the belt, the rest - arrange at the same interval.
- Close the belt and pin to the rep belt of the detachable skirt, aligning the ends of the belt with the line of the middle back.
- On the belt, put labels for the upper parts of the buttons. Sew them up.


Thanks for the pattern! Everything is clear and accessible)