Although today in stores it is easy to detect almost any sports equipment, many people still prefer their own hand-made devices. This option allows you to significantly save money, but get no less effective tool. For example, The same bar can be quite adequately assembled from various available materials.
Features homemade products
A sports bar can have pancakes made of various materials, while the bar is usually created from a metal pipe of a suitable size. The best variation of handicraft equipment is concrete, allowing you to organize the most convenient and effective training.
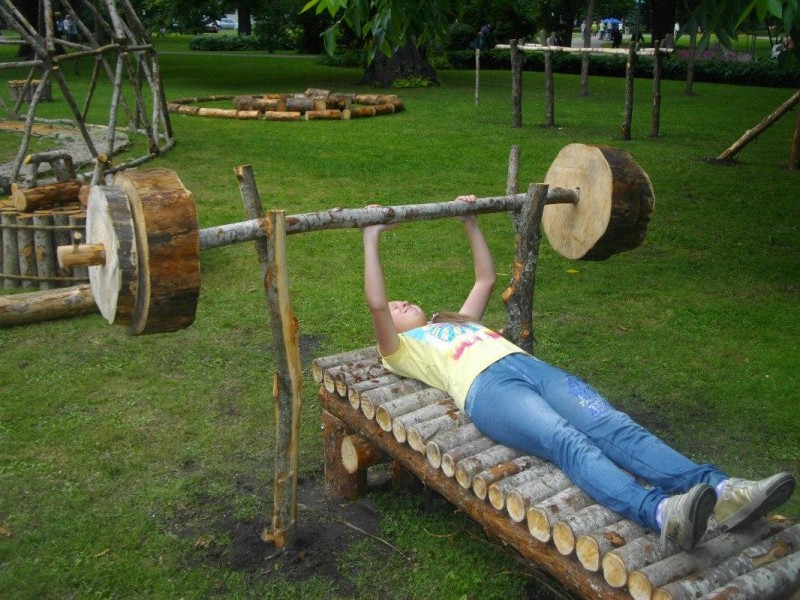
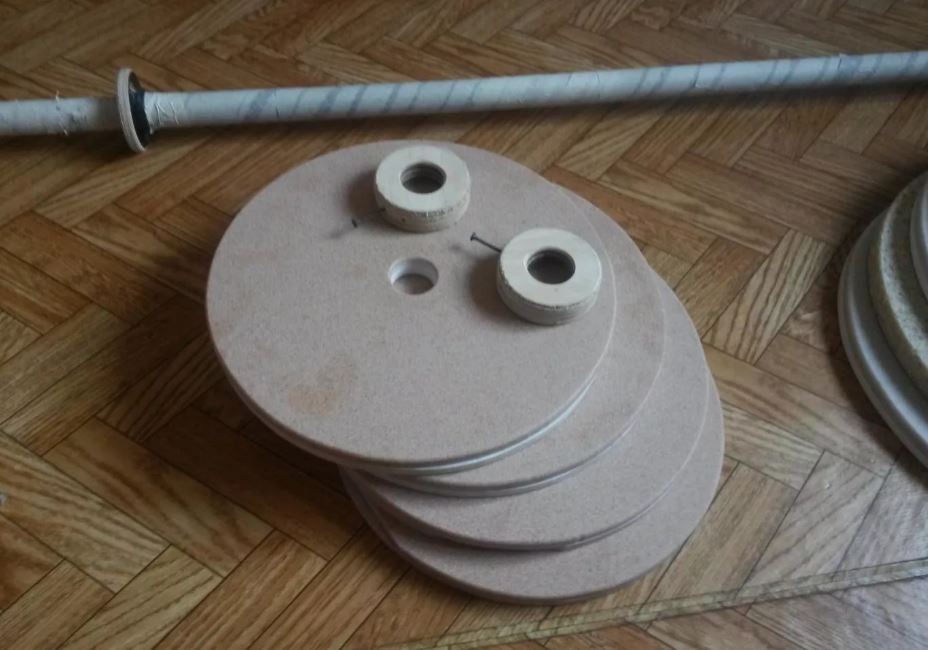
By the way, sometimes a wooden stick is also used as a neck, the diameter of which does not exceed 4 centimeters in order to avoid painful grip. This may be an old mop or even a rake. The iron bar should have the same diameter. Can also be used steel bar, whose length reaches 2 meters, and the diameter of the cross section does not exceed 35 millimeters.

A hollow metal pipe, if necessary, is filled with concrete or even reinforcement of a smaller diameter.
The size of the neck is determined depending on the material from which it is created. The less the reliability and durability of the item used, the thicker the neck should be. However, if at the same time it will be inconvenient to hold it in hand, all efforts will be in vain. It is important that the length of the neck necessarily exceeds the mark of 1.2 meters. For comparison: the industrial neck reaches 2.2 meters.

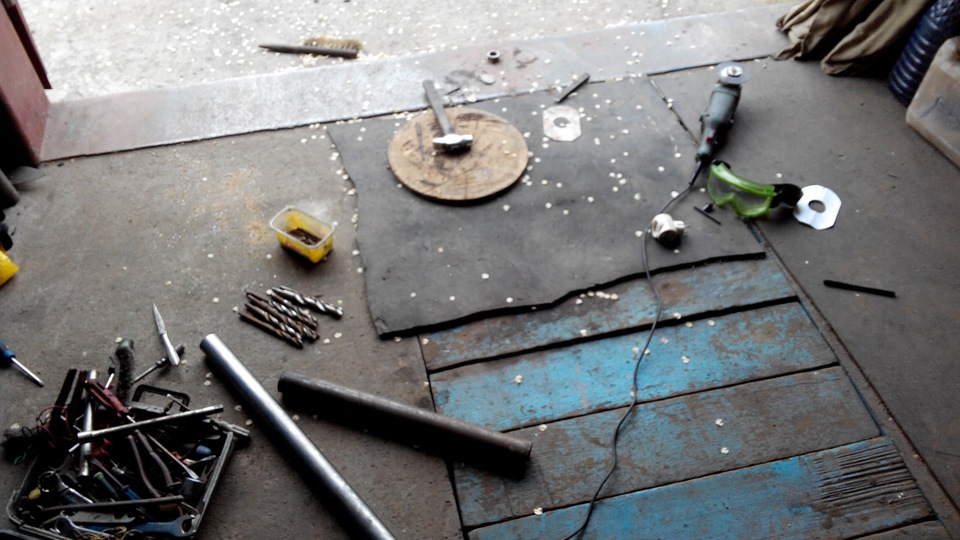
The design process is carried out using standard tools, usually available in the household. We are talking about a drill, hand or electric, a hacksaw for metal or "Bulgarian", a screwdriver and screws. The master, who decided to make a barbell, would still have to learn the basic skills of metal cutting and welding. In that case when from welding it would be desirable to refuse, it is necessary to use screws.
During the creation of a homemade bar should follow a few basic rules:
- the neck should be so strong that it can withstand the weight of pancakes, even if the weight is increased during training;
- it cannot be too thick or, conversely, be too thin, as it will be inconvenient to hold it;
- in the case when the neck is made of metal, it makes sense to supplement it with a rubber pad that will save the palm from slipping.
What can a barbell be made of?
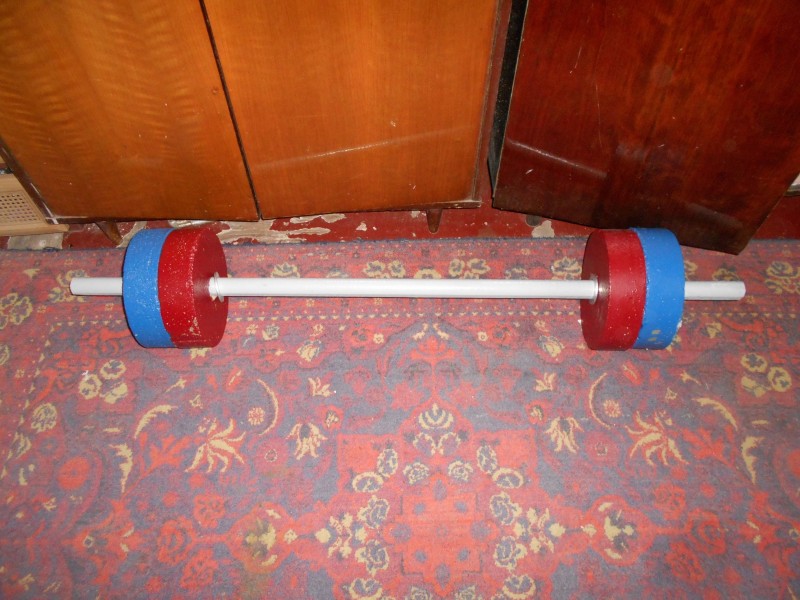
Home bar is easy to assemble from scrap materials available in almost any household. For example, the simplest design is created from a metal neck and concrete, decorated in the form of a kind of pancakes. The rack in this case is assembled from concreted pipes or bars.
Collect the bar will turn out of ordinary plastic bottles filled with sand, plain water or a mixture used for the manufacture of cement. The neck in this case is created from an iron pipe, and the bottles are selected either one and a half or two-liter.
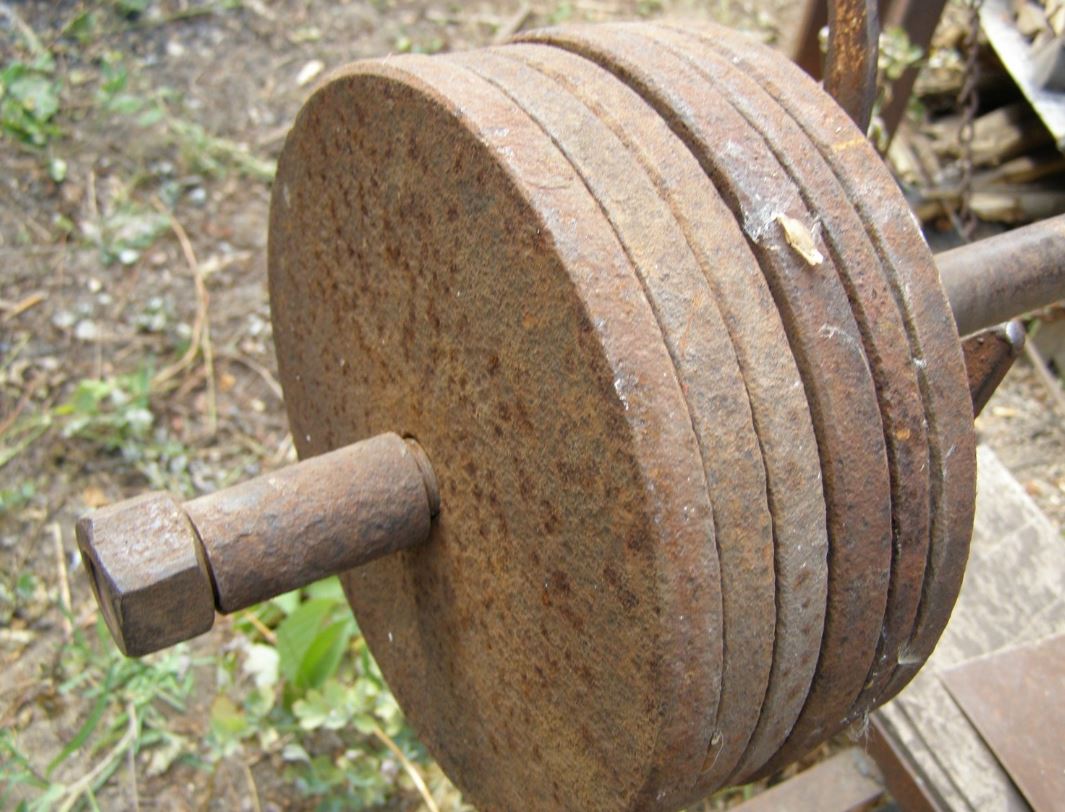

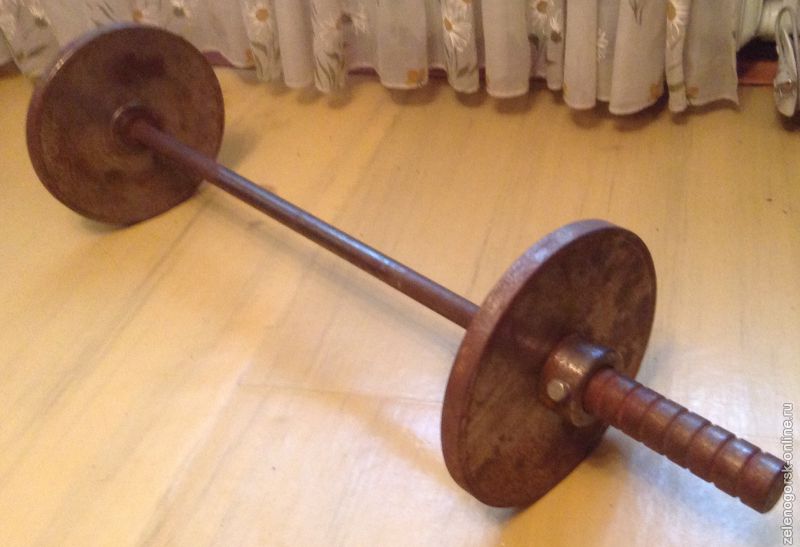
Creating a light rod is possible using iron, or, more precisely, steel, from which disks of the selected diameter are cut. Due to the fact that the hole weighting is done more than a thread, but less than the neck itself, they can be further tightened with a nut. At all, Handy craftsmen use a variety of items stored in the garage.

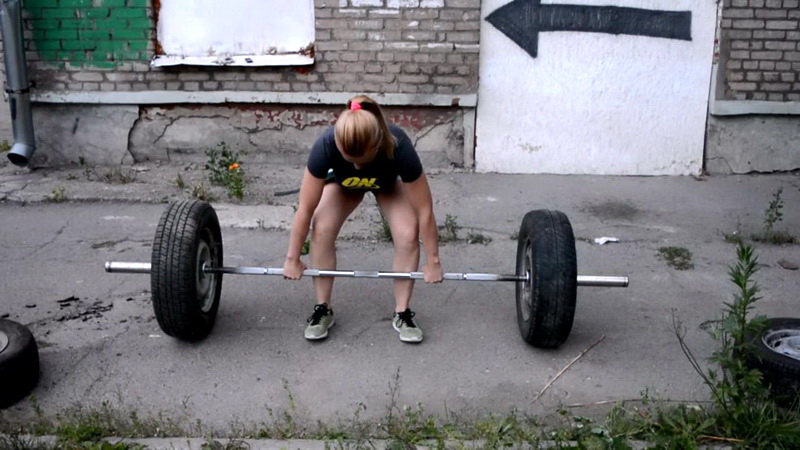
For example, they design sports equipment from weights, wheels from a car, tires, spare parts from a motor, or even canisters filled with metal parts.
Step-by-step instruction
One of the most common options for manufacturing a barbell at home implies the use of:
- stainless steel pipe, whose diameter is 25 millimeters;
- materials for the manufacture of concrete, that is, cement, sand and gravel;
- polyethylene fragments;
- wide diameter pans;
- paint brushes;
- bolts with washers and nuts;
- welding machine;
- "Bulgarians";
- perforator;
- spanner.
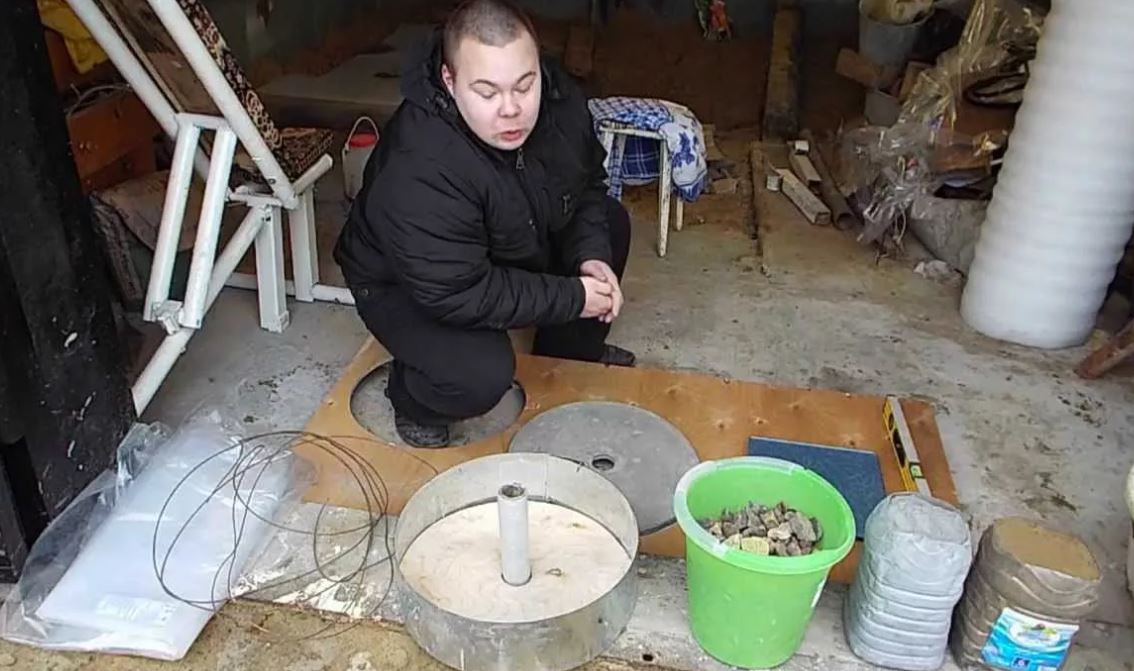
The size of the pipe, which will act as a neck, is determined depending on the planned parameters of pancakes and grip. When we do this construction with our own hands, we should start with the casting of concrete pancakes. A pan of suitable diameter will serve as a form. It is recommended to make several pancakes, differing in weight, which together can be assembled into one bar.
As an option, if it is customary to cast two pancakes weighing 25 kilograms, then a mold with a diameter of 32 centimeters will be involved. Their thickness should be sufficient to avoid damage. Concrete is kneaded directly in a saucepan, pre-lined with wetted polyethylene from the inside.
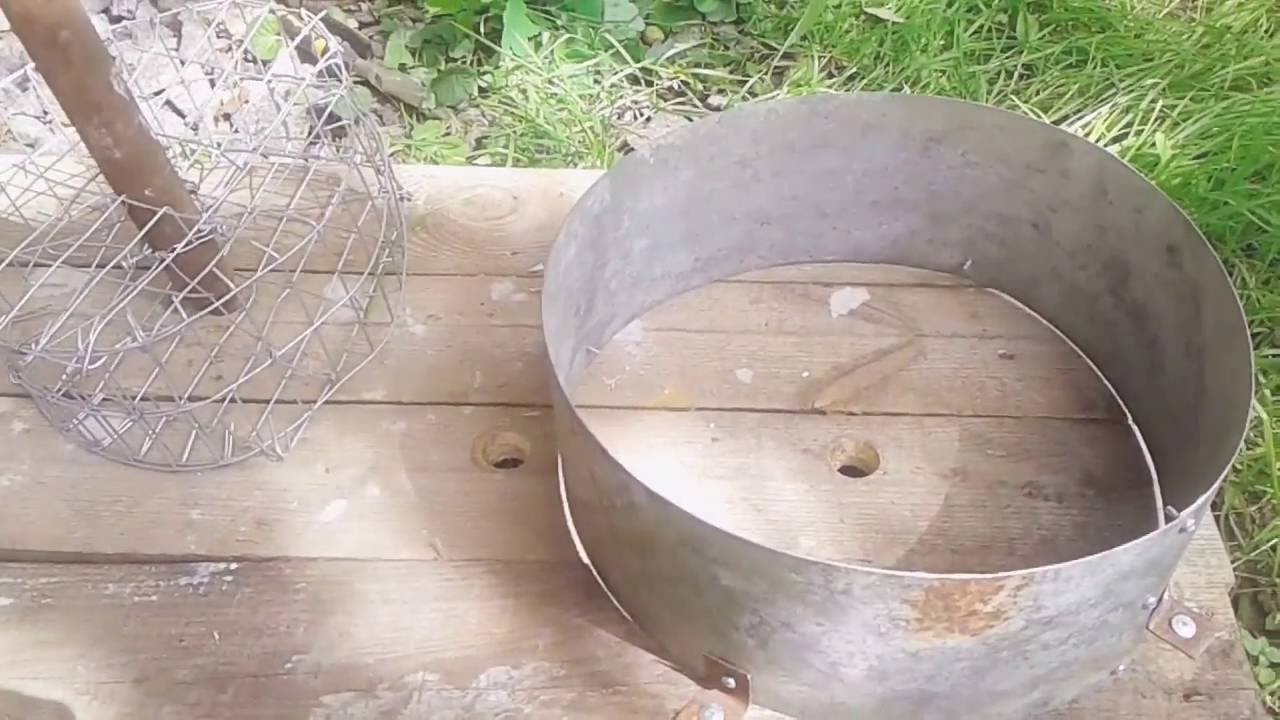
Such an action will then allow you to easily get a frozen pancake.
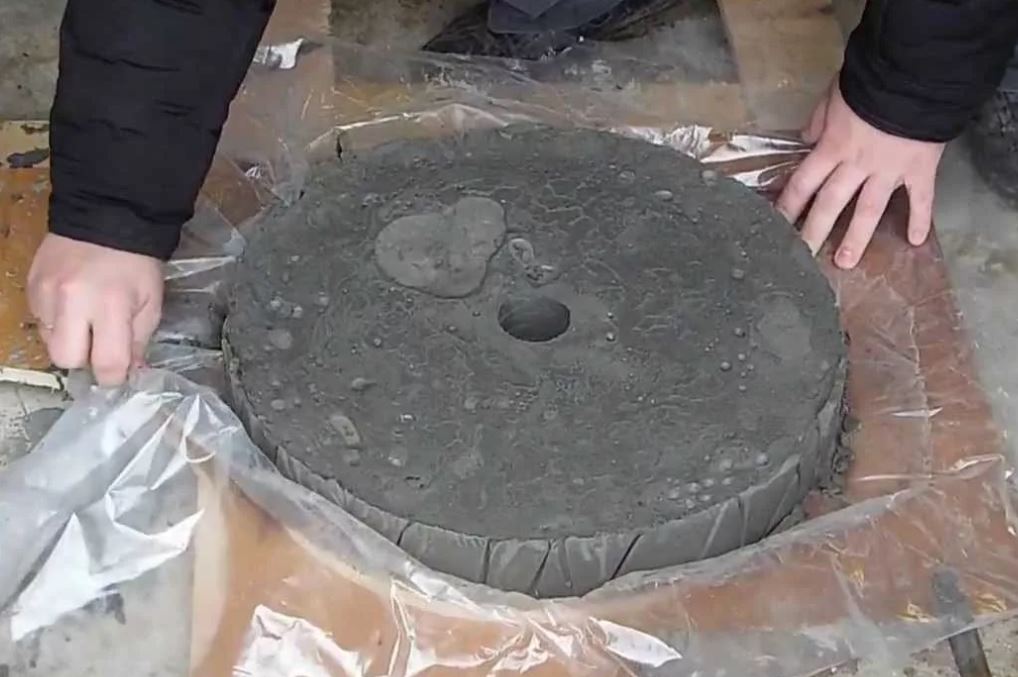
To create the substance of the required proportion, you will need to take 7 kilograms of sand, 8 kilograms of gravel, 10 kilograms of sand and 3.5 liters of water. The ingredients are mixed until uniform, after which a stainless steel pipe sticks exactly in the middle of the pan, which will become the neck. At the end of the solidification process, the stick will have to be removed, but if necessary, the pancake will be easy to put on and take off. It is more correct to create one concrete block after another.

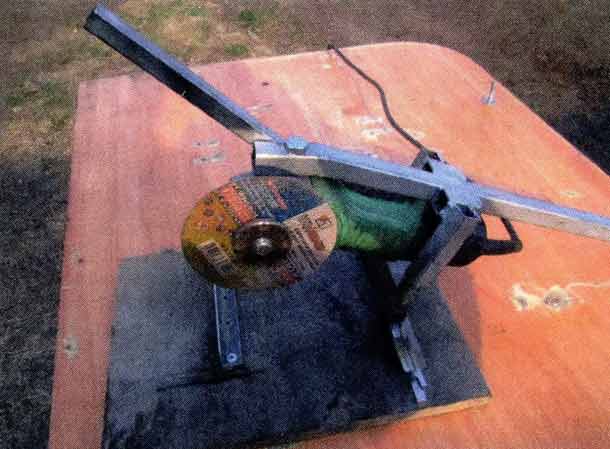
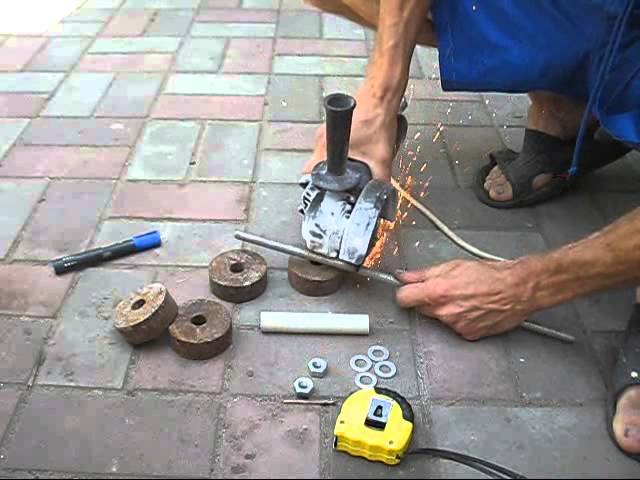
If, after weighing concrete pancakes, it turns out that the weight was uneven, adjustment will be carried out using the "grinder", equipped with a grinding wheel.
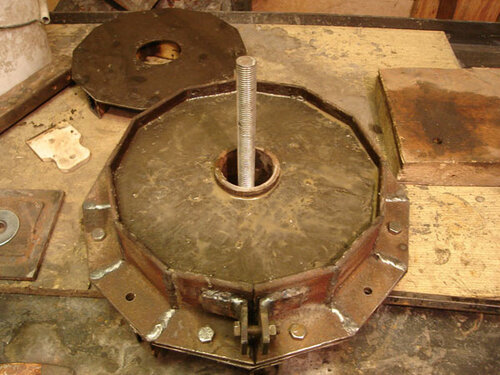
It is better to paint the finished pancake, since the coating can create protection against liquid absorption, which, in turn, leads to swelling and destruction of parts. Next comes the creation of a neck designed for pancakes. In order that the last reliably were fixed on a pipe, it is necessary to create ledges. The welding machine will help in this business, using which it will be possible to create rough seams on a circle.

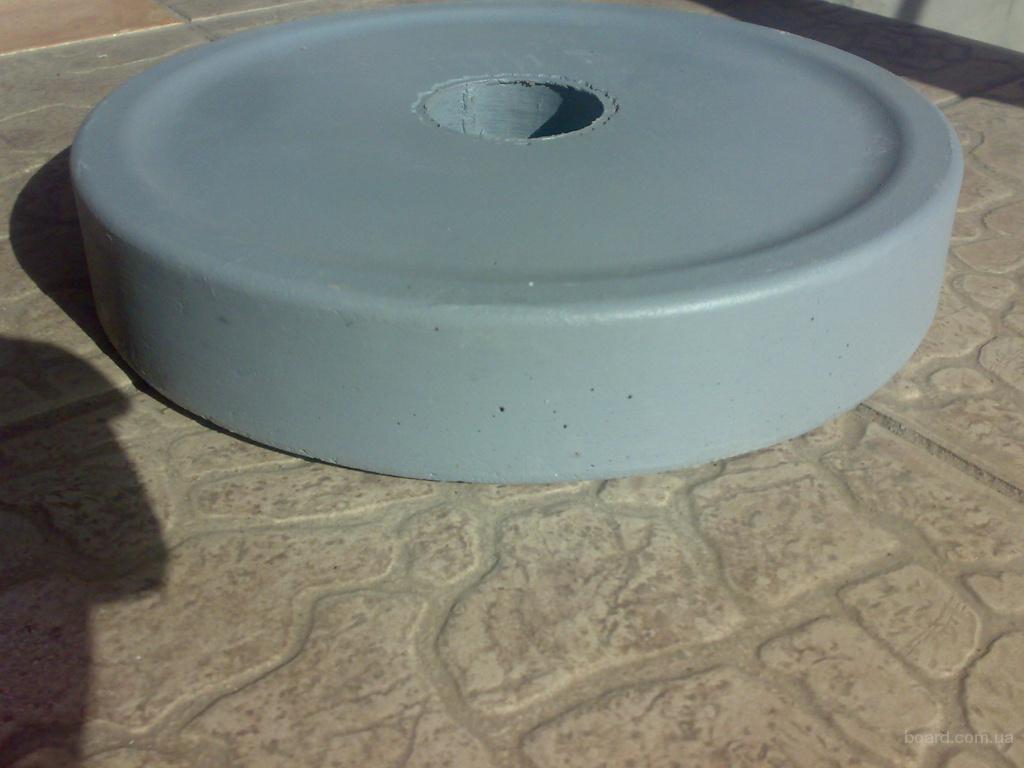
From the edge of the neck will have to retreat by 40 centimeters, provided that the length of the entire tube reaches 2 meters.
There is, by the way, a different way of making concrete pancakes, and perhaps for someone it may be more convenient. From materials and tools in this case will be required:
- plywood used for edging;
- plastic form;
- sand;
- cement;
- wire and wire mesh.
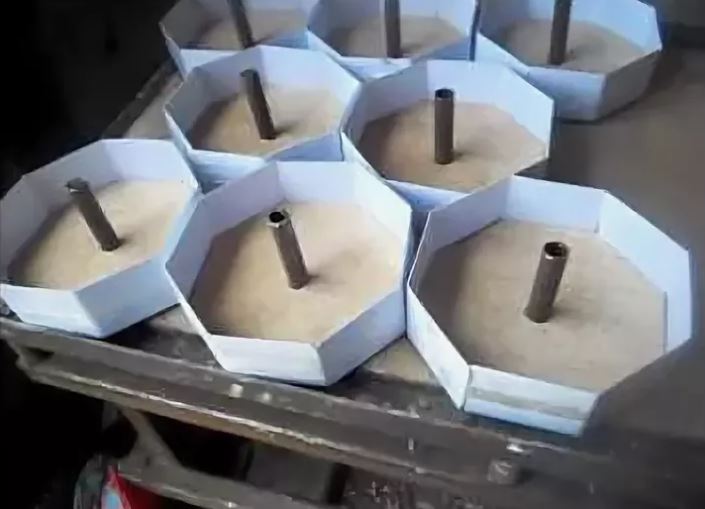
The form to be used for pouring concrete is fixed on the plywood. Inside immediately placed tube, the diameter of which corresponds to the selected neck. In addition, it is recommended to place in the form of a wire of medium thickness, which will give the pancakes a rounded shape. Sand, cement and water are kneaded to produce concrete.
Part of the resulting substance is poured into the form and compacted. Immediately put the wire, then poured the remnants of the mass. The surface of the future pancake is compacted and it remains only to wait for it to dry.
Rack rod is more convenient to do on the basis of metal tubes, concreted into the ground. After calculating a comfortable height, a punch should be drilled holes, which further will be inserted bolts tightened with nuts, the task of which is to maintain the neck. To ensure safety, the ends of the bolts will have to strengthen the nuts with wide washers.
It is also recommended to paint all metal parts in order to avoid rust.To assemble the bar, pancakes just put on the neck, and then place the entire structure on the rack.

If we are talking about some of the simplest version, for example, bar of plastic bottles, you can do with those items that are always at hand. It is recommended to prepare from 6 to 10 tanks of two-liter capacity and fill them to the top with sand.
The amount of load, therefore, easily varies depending on the goal. Fixation will be carried out using adhesive tape or wire. At first, the bottles, filled and tightly closed, are fixed between themselves, after which the cutting easily enters the hole between them.

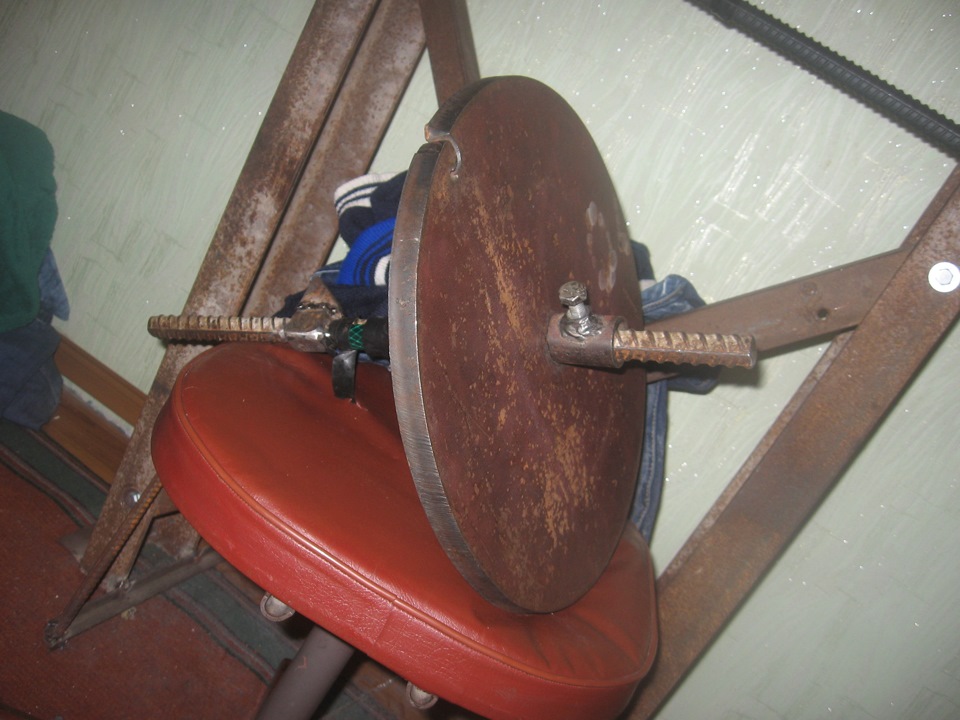
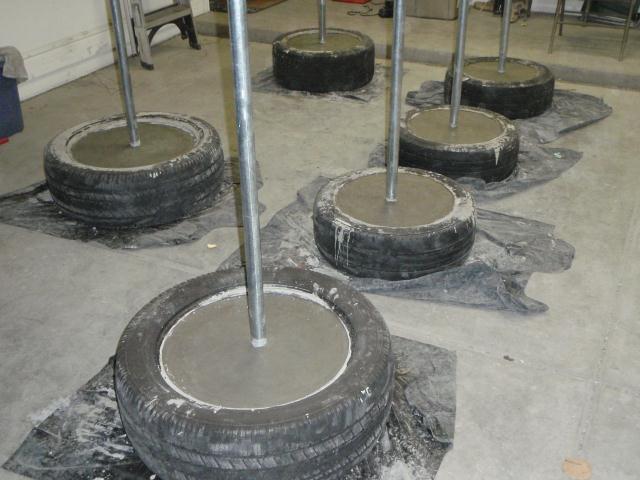
The use of tires is recommended to accompany the use of rocker arms for greater convenience. Fixation of used flywheels will require fittings with a diameter greater than 4 centimeters and threaded threads cut from both sides. Often a rubber hose is put on the reinforcement so that hands do not slide. Pre-oiling the reinforcement, it will need to be “dressed” in rubber, after which it can be fastened on both sides with nuts.

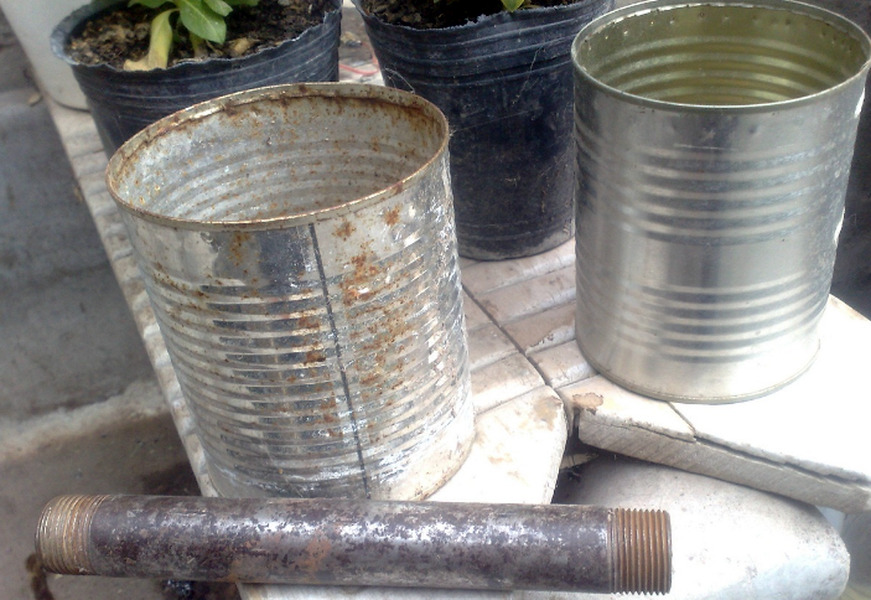
Even cans of paint whose volume is approximately 3 liters are used to create the rod. In addition, you need cement, a neck in the form of a steel tube with a length of 2 to 3 meters, as well as a couple of pieces of steel pipe 30 centimeters long. The bottom of the cans is cut off, and inside with the help of aluminum wire pieces of pipe are fixed.
It is important that their diameter slightly exceeds the diameter of the neck. It remains only to pour the cement into the tank and wait for it to solidify. After that, it will only be necessary to combine the neck with the pancakes and get ready sports equipment.
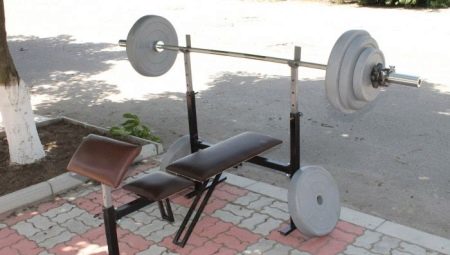
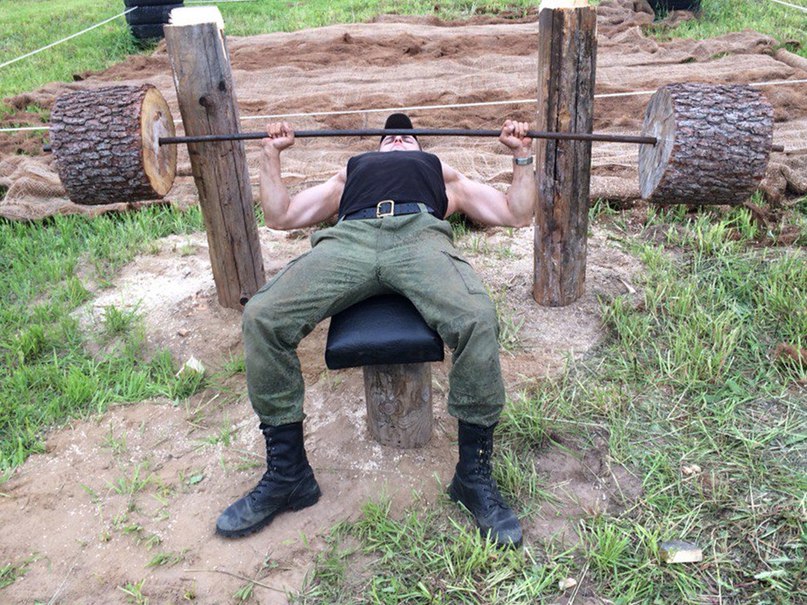
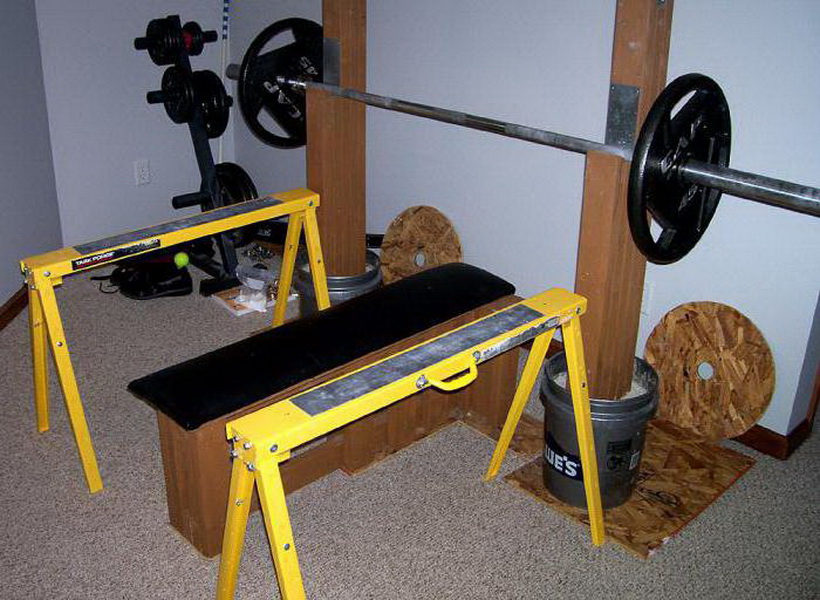
How to make a bench?
In order to turn the bar into a full-fledged simulator, you will have to add a bench to it. It is a universal design that allows you to train the bench press, which is the most common exercise with this sports equipment. It is easy to find drawings on the Internet, which show that the stand itself is mostly assembled from square pipes and, of course, wooden boards.
The pipe should have a square section with sides of 50 millimeters and 4 mm wall thickness. Experts recommend to purchase 8.2 meters of length, which is enough for the whole structure and will remain for stock.

In the case when the planned activities will involve small loads, metal tubes can be replaced with wooden bars.
The size of the optimal board is 1.3 by 0.3 meters. For convenience, it is additionally recommended to upholster with any soft material, for example, a leather substitute or leatherette. Suitable and fabric cover filled with foam. In addition, various connecting parts are required: a pair of holders, 6 caps, fasteners and 12 growers. By collecting a bench on the drawing, you can go to the bar itself.
How to make a barbell with your own hands, see the next video.


