
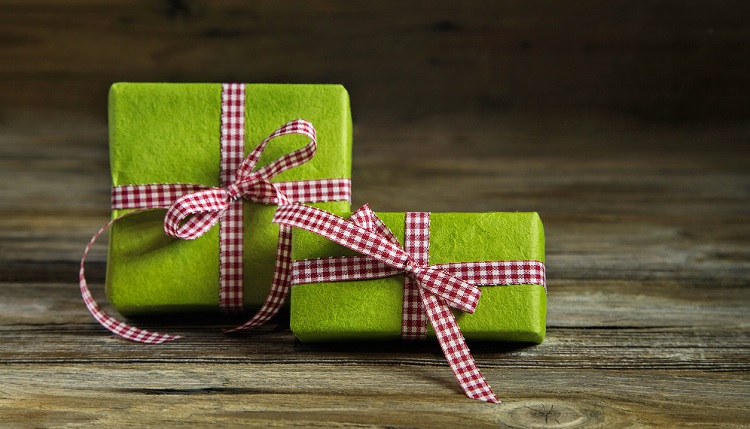
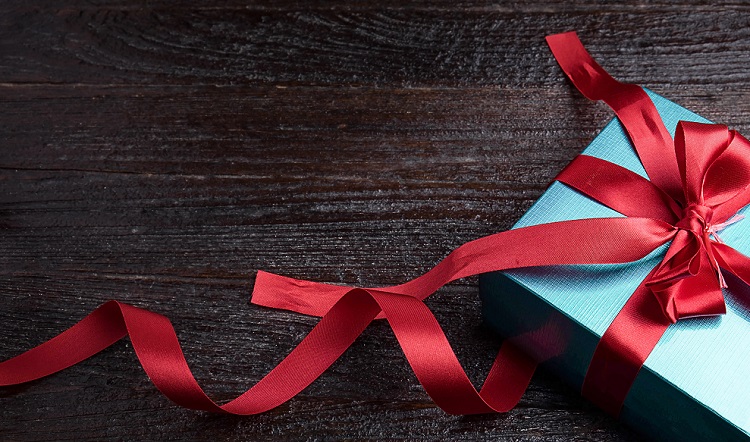
When preparing a presentation, not only he himself is important, but also his design and presentation. The recipient will be pleased to receive a beautifully designed gift, and not a thing in the production packaging. Sometimes even one effectively tied bow will be enough for a present to take on a festive look.
How beautiful to tie?
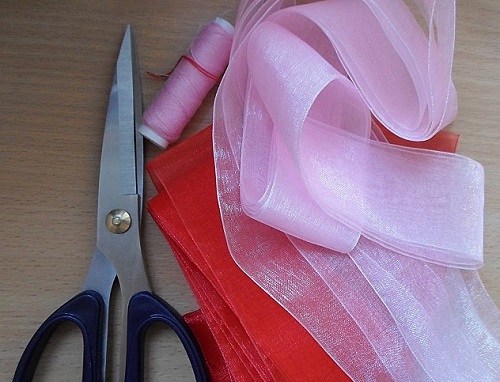
Bows for packaging can be made from different materials. One of the most common is textiles.
To assemble a neat bow it is advisable to choose a fabric that holds the shape well. These include rep ribbon, satin, satin, nylon, organza or tulle. You can try the velvet narrow braid.
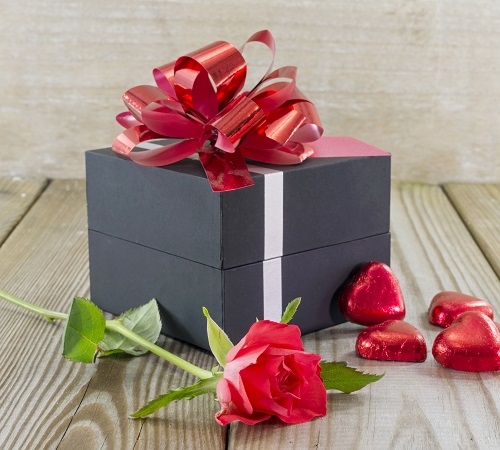
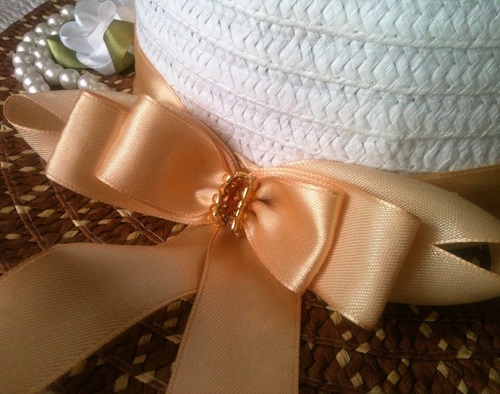
It should be remembered that the design of gifts for men and women are different. Men's gifts, as well as official souvenirs, are usually decorated with classic bows of a laconic form, without ornaments and excessive pomp.
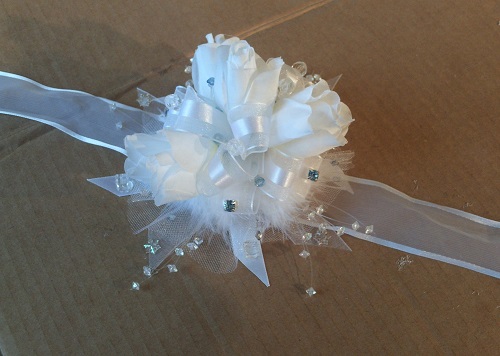
Women, especially close ones, are allowed to decorate the ribbons with various details such as beads, rhinestones, fringe, lace or buttons, or a combination of several types of materials.
Consider several options for tying gift bows.
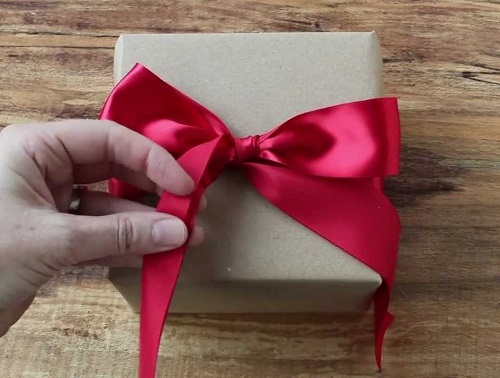
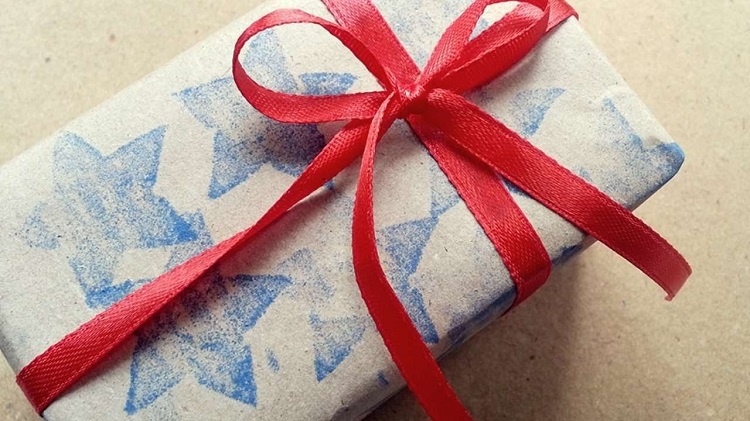
Classical
Narrow ribbons are most suitable for this shape.
The method of tying is extremely simple.
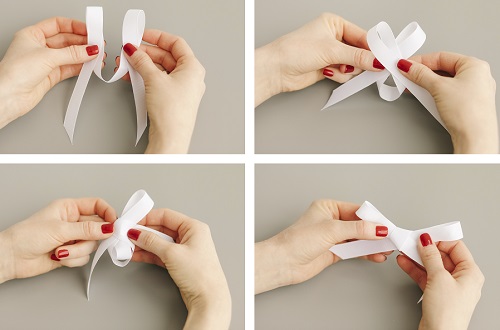
- Take tape or tape. Its length should correspond to the size of the bow.
- The selected material is visually divided in half. From each half folds loop in the form of an ear.
- Then the right “ear” is superimposed over the left crosswise. Continuing to wrap it around the left loop, we tie a knot.
- Carefully align the resulting bow, alternately pulling the "ears".
- The tips of the bow is better to cut diagonally, a little corner or as a children's flag.
It is necessary to ensure that the nodule is smooth, without creases. You can use scotch tape to attach the jewelry to a box or gift bag.
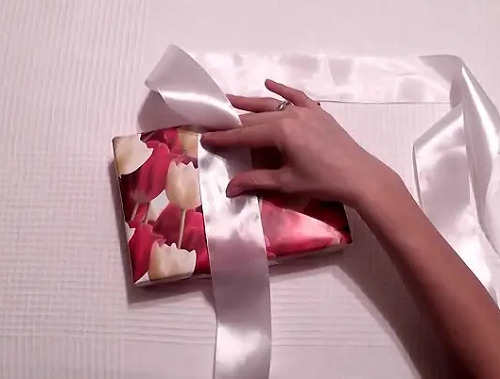
Another simple option from a narrow satin ribbon is to pre-tie the packaging before folding the bow. The algorithm of action is as follows.
- First measured box or gift bag. To calculate the length of the tape, measure the length of the cap and the height of the package; the second value is additionally multiplied by two.
- Based on the data obtained, calculate the size of the tape. For this is the sum of the length of the cover and double the height, which then increases 5 times. The result will be optimal.
- Then we begin to wrap the tape around the packaging, for which its center is combined with the middle of the box. To avoid bias, you can use a small piece of double-sided tape.
- Both ends intersect on the opposite surface. Then the tape is wrapped in a horizontal direction. As a result, the tips should be where the whole procedure began, near the middle fixed with scotch tape.
- They are threaded under the ribbon and tie a knot.
- Next comes the bow of the classic form, described above.
- In the final operation, the ends are neatly trimmed.
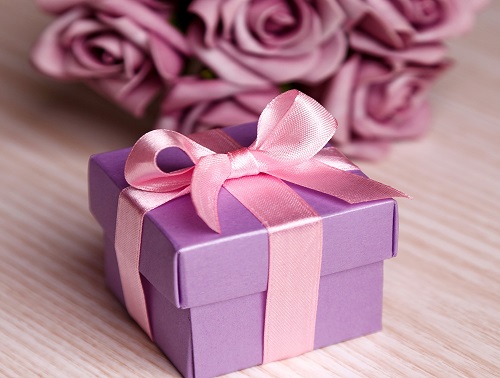
This design looks especially impressive on small boxes.
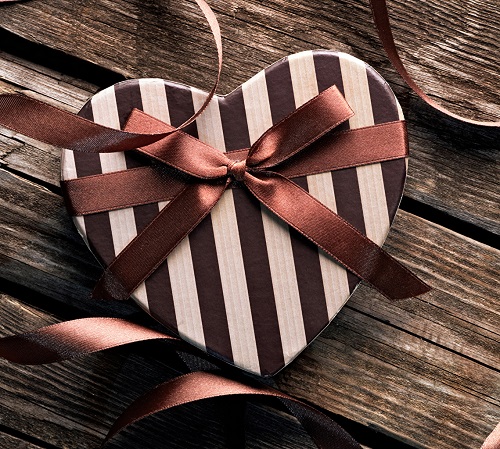
Satin ribbons
Atlas is the type of material that keeps its shape perfectly, is not afraid of water and looks spectacular.
There are several ways to tie satin ribbons. One of them - the classic, has been described above. The algorithm for others is presented below.
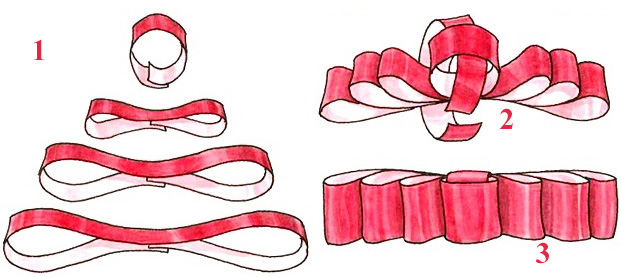
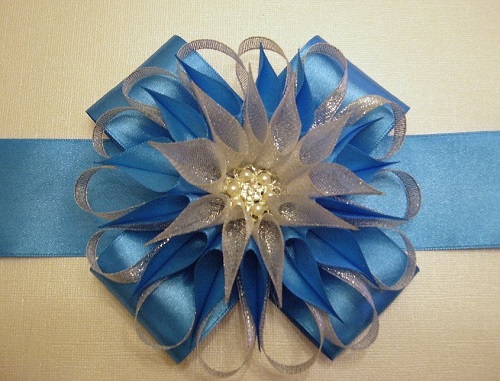
- Double. For this design will need two tapes, different in width and color.Next, the first strip, which will subsequently be external, you need to fold the accordion. You need to lay the fold as much as you want to get a bow. Lay the second strip (inner) like this: cross the ends in the middle, giving a bow-like shape. To collect the entire composition, a third, narrower ribbon is required. The folded stripes overlap and are taped. The node expands, the tips are cut off.

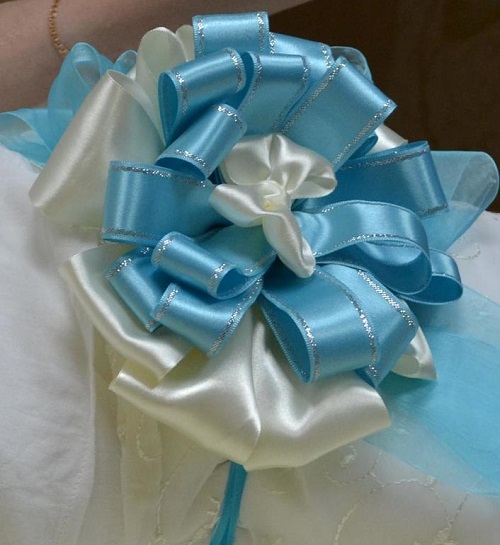
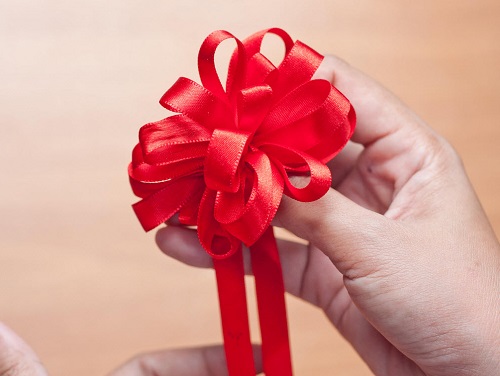
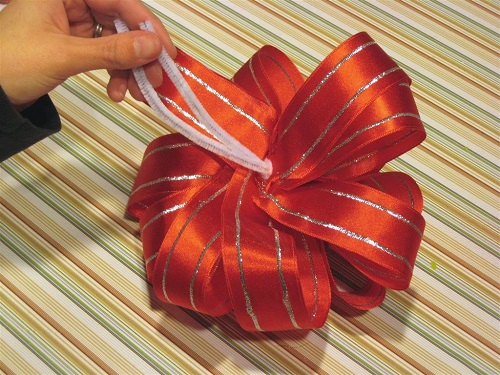
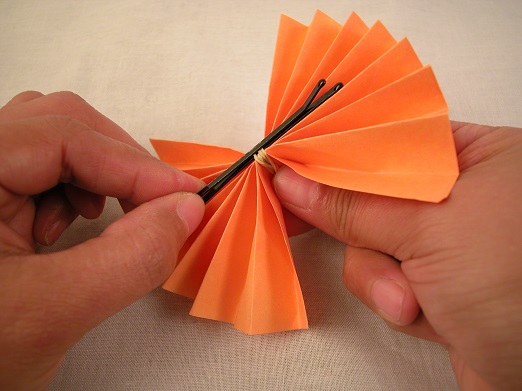
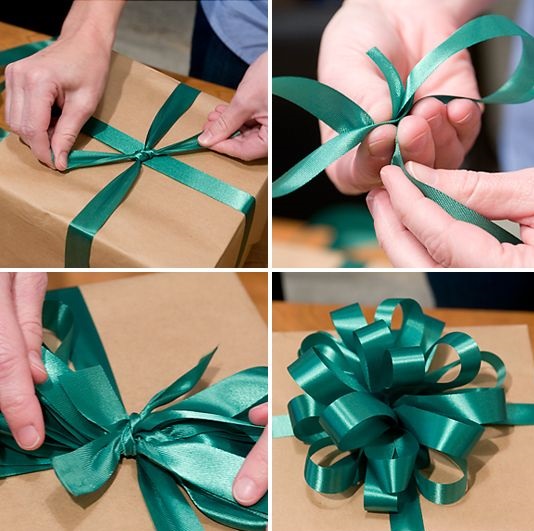
- In the form of a flower. To create the jewelry you need a long ribbon. It should be folded accordion several times. Then a narrower strip of material billet in the center. Next, gently straighten the loops. This should be done symmetrically left and right, starting from the inside. The result will be a flower.
If you fold loops of different lengths when folded, the petals will be graded, and the decoration will be multi-layered and spectacular.
- "Dior". Some call this method fan. To create an elegant bow is more suitable monochromatic satin ribbon of medium width. From it you need to cut three pieces, one more than the other 1.5 times. Each is glued or stitched into a ring. The seam is done in the middle of the inside. Details overlap each other, starting with the larger, and are fastened either with a stapler or with a pair of stitches. After another strip is cut. Its length must be such that the ring made of it does not fit, but rather stands, since it will be the center of the whole structure.
The fifth detail is the smallest. It is necessary to hold all the elements together. To do this, it is threaded into the middle ring and all the parts are pressed together, closing the connecting seams. Decoration is ready. The more elements will be used, the more magnificent the bow will be.
The option of colorful ribbons is appropriate for young and playful girls, children or girlfriends.
- On the fork. Needlewomen offer to decorate small boxes to prepare miniature bows, tied with the usual dining forks. It is convenient to make them from a narrow satin or rep ribbon. The length of the segment does not exceed 15 centimeters. The algorithm of action is as follows.
- Take a fork with four teeth.
- Tape impose on it from above. The upper tip will be inoperative, so leave it the length that it should be.
- Wrap the fork around the other long end and pass it from the front between the middle teeth, pulling it from the back. In this case, the first tip should be under working.
- Then the working end returns forward from the top through the center hole of the plug.
- After they wrap up the non-working tail from bottom to top, thread it into the resulting loop and tighten the knot.
- The resulting bow is removed from the fork and tails trimmed.

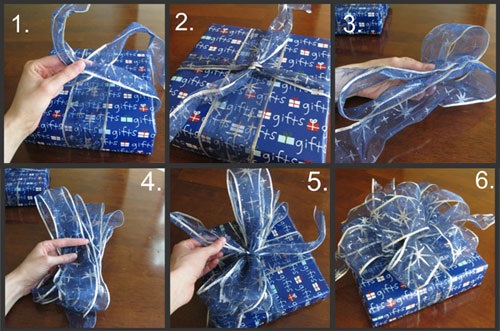
From nylon or organza
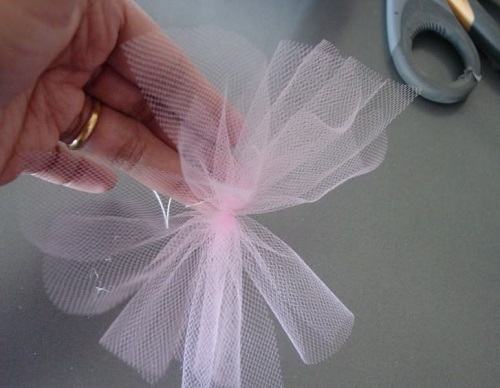
Ribbons made of caprone and organza perfectly keep their shape, while, unlike satin ones, they make very lush airy flowers. This material is great for creating terry and graduated jewelry.
Kapron tape of any width will be suitable as a base. The wider it is, the more magnificent the decoration will be. It is necessary to make several additions, the number of petals depends on their number. Then in the middle of the two sides cut out the pieces in the shape of triangles. Please note that there should be a jumper equal to one third of the width of the tape. At this point, the part is tightened by another short length. The final touch is pulling the loops in different directions. Start from the inside and move gradually to the outside.
Unlike the satin terry flower, this bow is more airy and light.
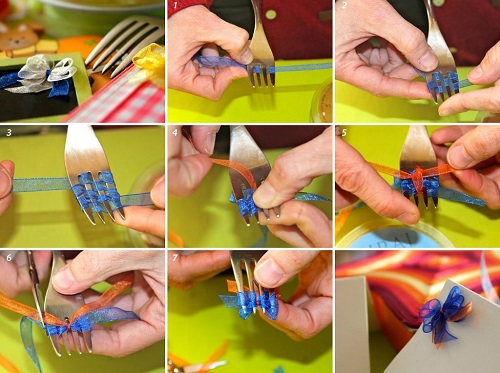
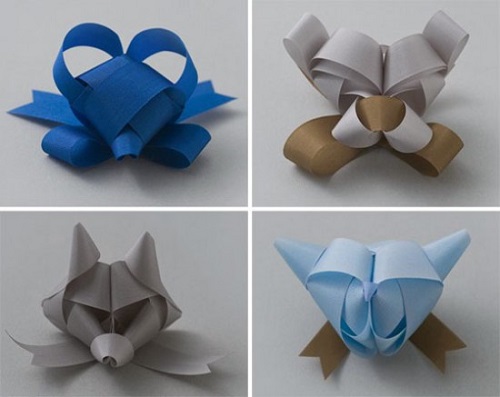
Also for miniature jewelry boxes, bows can be knit using a fork. The action algorithm for creating a simple form is similar to the method described for satin ribbons. And now we give instructions for more complex.
- You will need a band of organza of two shades 7 and 5 cm long.
- A long strip is wound between the teeth of the fork in a staggered manner: first from the top, then from the bottom. To do this you need to start one way, then the other, until 5 levels are formed one above the other.
- After this, a short segment is passed under the first one at the base of the fork between the central teeth and is pulled so that its middle is in the center.
- Next, the coiled strip is pulled together and tied into a knot.
- Then you should remove the structure from the fork, straighten the “ears” and trim the ends. The result is a double mini bow.
Kanzashi technique
The most beautiful and sophisticated decorations are obtained in the Japanese kanzashi technique. To create bows will require patience, perseverance and hard work.
Consider a few simple methods for producing a flower bow.
Two tiers.
- Two satin ribbons of the same color are taken. One is 2 cm wide, the other is 5 cm.
- From each required to cut into 6 blanks for petals.
- First, the first level is assembled from wide parts. Each element is folded in half and strung with a needle on the common thread with a “forward needle” seam.
- When all the petals of the first row are collected, they are pinched. Similarly, the second level is assembled from a narrow ribbon.
- Then a small tier is superimposed on a large one and they are stitched together. The middle is decorated with beads.
- Between the layers, you can add different decorations in the form of feathers, organza, shiny thin wires.
Elegant
From a satin braid cut not less than 16-17 pieces of 10 cm. Of them you need to fold the petals in the form of kulkov. The ends are wrapped inside and sealed with glue. You can use a transparent "moment."
Then begins assembly with a needle-thread. The first row consists of 3 petals, the next tier - of 5 pieces, the next - of 7 and so on. The middle is decorated with an artificial stone or a bead.

Step by Step instructions for creating paper decoration
In addition to the textile bow, you can make your own hands with a similar paper ornament. It will turn out not less festive.
Unlike cloth, paper is always available in any home, and its cost is much less than tapes. However, to get a beautiful lush bow that can compete with the fabric, it is necessary to correctly mark and fold the workpiece.
It is better to first practice on drafts.
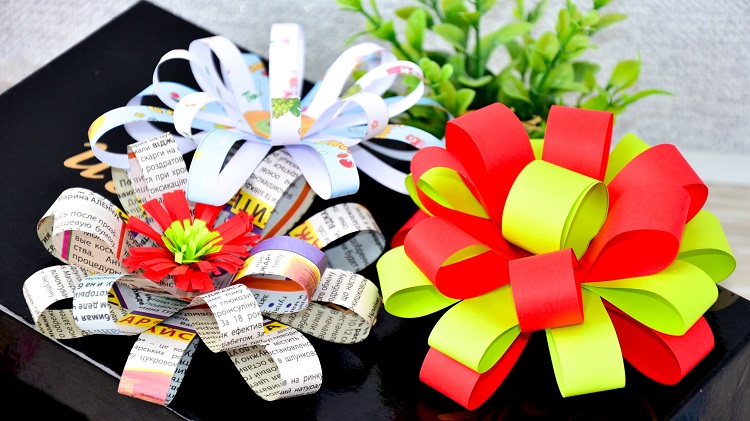
Simple options
All of us in childhood collected from paper "accordion". Now, if you collect one from colored paper and intercept it with a jumper in the center, you will get the simplest version of the decoration.
Try to add 3 or 4 rectangles of different colors with “accordion”. Each subsequent should be slightly shorter than the previous one. Details are embedded into each other and held together in a small piece in the middle. It turns out simple, but original.
You can use ordinary paper napkins for decoration. Take 5-6 pieces, turn them around and put them together. After the whole pack you need to fold as follows: start in half, then again in half, then bend the corner and get a triangular blank. From it you need to cut the detail in the form of a petal. Make sure that its base is in the part of the blank that is the center of all napkins. After unfolding, you will see several flowers. They should be sewn together, carefully straighten the resulting terry decoration and attach it to the package.
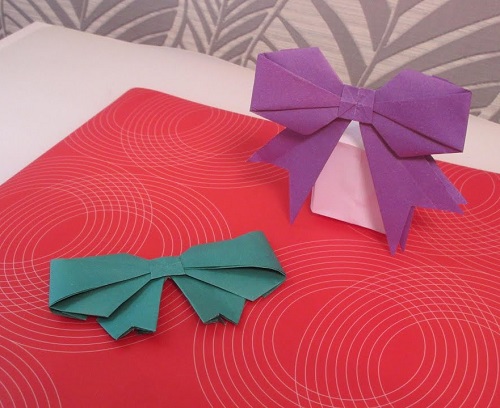
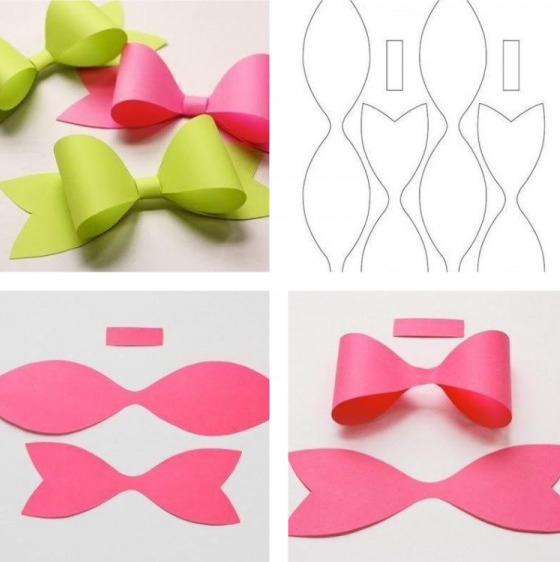
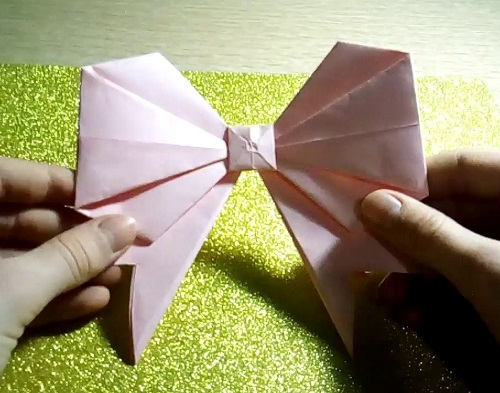
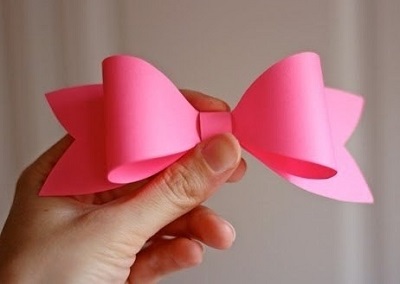
Using templates
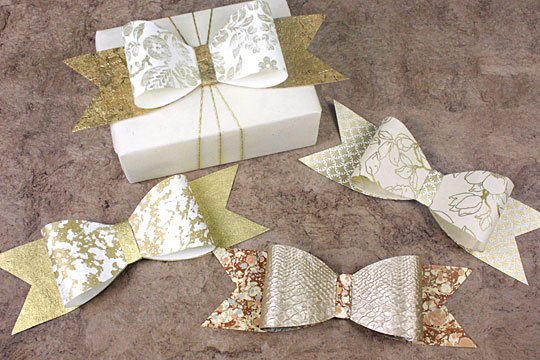
For paper models, patterns are the easiest way out. Such a decorative bow is able to make even a child.
It will take two blanks. One in the shape of a butterfly, where instead of wings the tips of the planned bow protrude. The second is similar to the eight, the jumper of which is the place of the knot. The detail cut by the second pattern is glued together so that the “ears” of the eight are folded into the loops of the bow. Then the received element is pasted on the one that is cut out according to the first pattern.With a narrow paper strip, both parts grasp in the center, forming a false knot.
The connecting seam of the last part is best done from the wrong side.
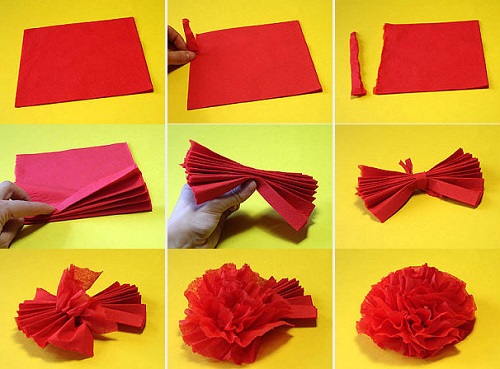
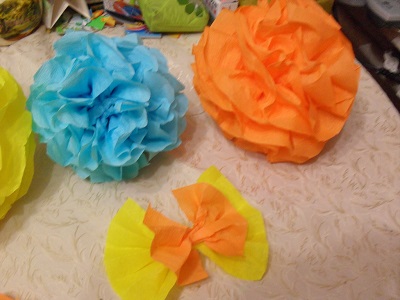
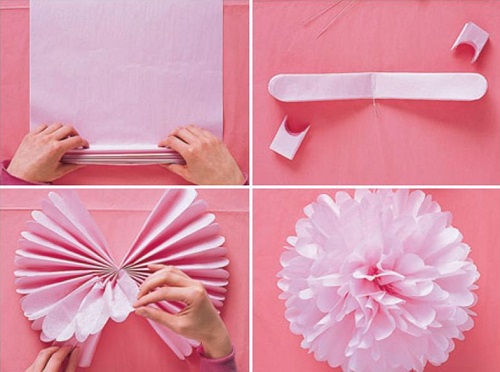
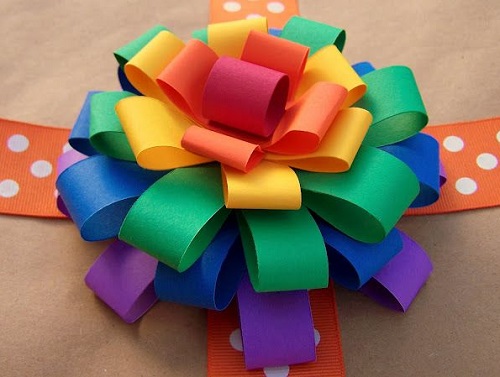
Lush paper flower
To fold such a bow, you need a lot of papyrus paper. You can take any other, but it must necessarily be thin. Otherwise, cut something out of it will be difficult.
At the first stage, an accordion is assembled from a long and wide paper tape. Its width depends on the desired size of the petals. The more folds, the more magnificent the flower will turn out.
Further, the edges at both ends are cut in a semicircle or other shape. It all depends on the desire of the master. After that it is necessary to tie a thread, a narrow ribbon or a band in the middle. Then you should carefully straighten the petals, directing them in different directions. It turns out very lush flower, almost a ball, which is simply attached to any package.
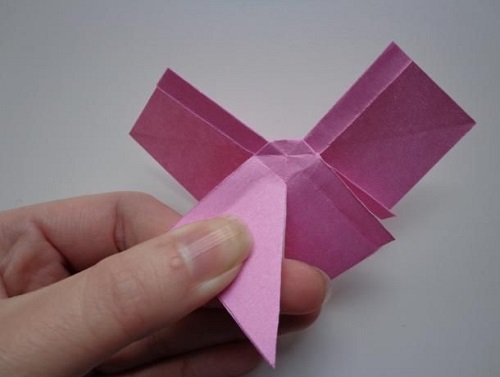
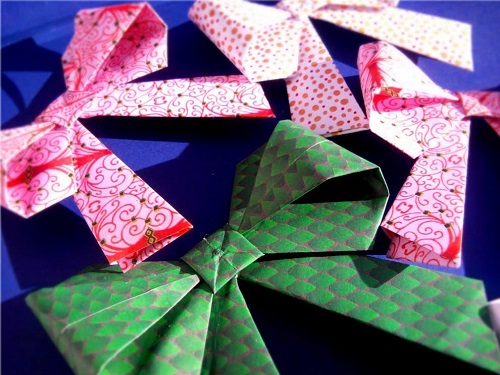
Origami
The Japanese technique of folding various paper figures is most appropriate for the design of presents. Of course, you will need a certain amount of patience and paper, since you may have to rehearse for a long time.
From the cut out paper strips, you can collect several options for jewelry.
- In the form of a star. To make a bow, cut several narrow strips. Each one needs to be folded in the shape of an eight so that the ends are inside in the center. Better to fix all the details with glue. Having prepared at least 8 elements in this way, fold them together on the wrong side and fasten the stapler. In the center, to close the junction, glue one strip glued together with a ring. It can be replaced with a bead or other decorative element.
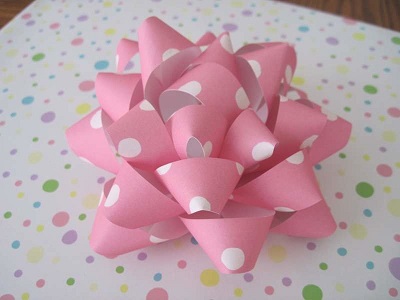
- In the form of chrysanthemum. Prepare a long paper tape. It is folded several times and narrowed in the middle on both sides, making triangular cuts. Then in this place is tied up with narrow tape or rope. Loops carefully straighten in different directions. Each "eye" is cut into narrower strips from the fold to the middle. The result is a terry flower.
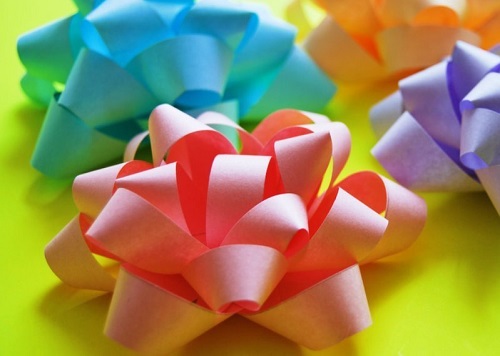

- Looped flower. The material is suitable printer color paper in three colors. First cut a circle with a diameter of 3 centimeters. It will be the basis of the flower. Then multicolored stripes are cut into 8 pieces of each shade 1 cm wide. The lengths will be different: 25, 22 and 19 cm. Each part must be folded in the form of a petal and glue the tips together. Then the elements are collected in the overall composition. First, the first level of longer petals is uniformly glued to the base, then the second, followed by the third. Each subsequent row fits in between the petals of the previous level. In the final, the junction is closed with a bead, button or appliqué.
- Another version of the flower of the eyelets. You will need to cut strips measuring 1.5 by 25 cm. Depending on the expected pomp, their number varies from 8 to 20 pieces. Each strip has edges glued together to form petals. Then they begin to gradually fasten to each other at the site of the seams. As a result, the circle closes, forming a flower. From the beautiful paper or cards cut central decoration. It can be decorated with beads, beads, scrapbooking and other elements.
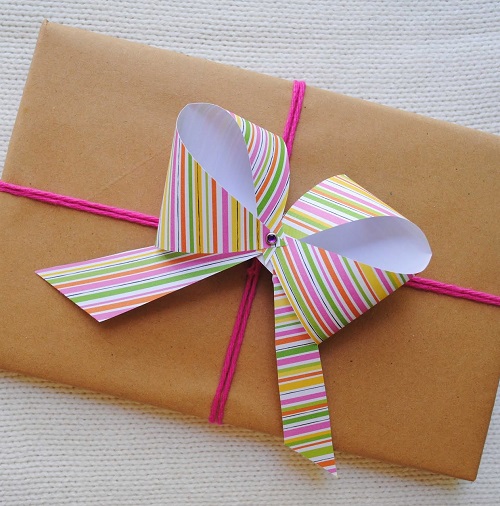
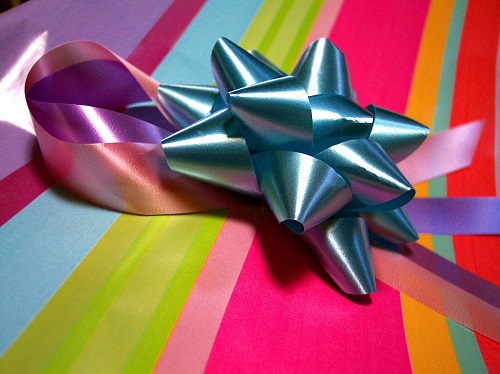
From gift ribbon
The gift ribbon is convenient because its edges do not crumble, it keeps its shape perfectly, is not afraid of moisture. In addition, this material is made of special high-strength paper, it is difficult to break it across and easily split along the fibers. The paper-plastic structure of the bow allows you to fasten it with an adhesive tape, stapler or glue.
Packing tape is sold in different widths, lengths and in a wide variety of shades. It is better to choose a bow of a contrasting color so that it does not merge with the packaging.
Consider several options for tying.
- Plain. You will need a length of tape equal to two lengths of the finished bow.The ends are glued together with tape or are connected by a stapler, forming a flat ring. Next, cut another small segment that will play the role of a knot. The ring is flattened so that the seam is in the middle. It is closed with a second blank, gluing its ends on the wrong side.
- Double bow. The action algorithm is similar to the first method, but the number of blanks is one more. It is necessary to make 2 rings of different diameter. When assembling the design of the bow, the smaller part should be on top of the large one. The third piece of tape tightens the ring in the middle, imitating a knot.
The elements can be of different colors, which will make the bow more effective.
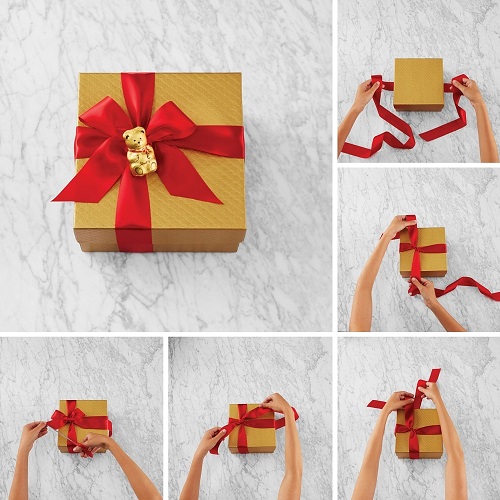
How to use the purchase bow?
If the time for the presentation of the present is extremely short or the needlework is not your strong point, then it is quite possible to manage with the purchase option.
Attaching a ready-made bow to the gift is easy, the main thing is to choose an appropriate element in color, shape and size. Specialized outlets offer a wide range of similar products. As a rule, they are made of gift paper ribbon, which is characterized by a variety of shades, patterns and shapes.
The edges can be perforated, patterned. There are foiled versions, more brilliant and interesting. The shape of the finished bows is different: very lush, consisting of a large number of loops, classic, with conical or triangular "ears", in the form of a flower, in the form of a tie, and so on. The length also varies. If you want to wrap the box, then choose bows with special ends for this. Without tying the decoration is attached with adhesive tape or glue.
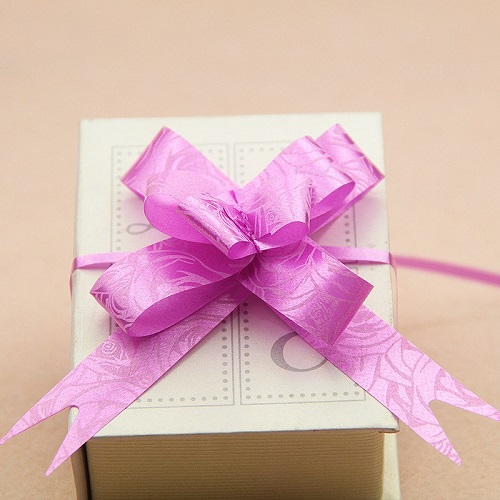
Going ready bow easily. Manufacturers have provided a specific mechanism that does not require extra effort from the buyer. It is enough to pull the special ribbons, and the ribbon will assemble itself into a bow.
The shape of the tips is given at will, but most often they are already cropped from the purchased versions.

Ideas for inspiration
Bows for decorating gifts are best suited.
Even the simplest of them can turn ordinary packaging into a festive one.
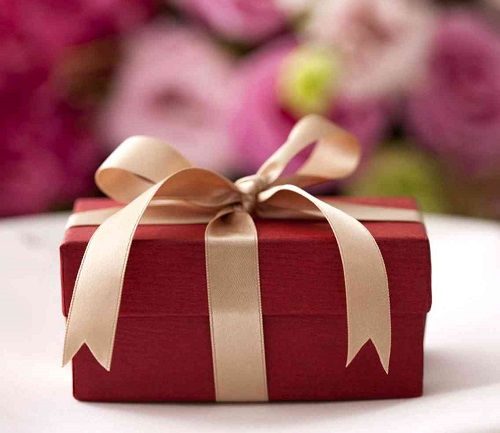
For men, colleagues and partners use the classic form. She is laconic, elegant and at the same time spectacular.

For gifts for mothers, grandmothers and girlfriends, paper ornaments made with their own hands or with children are perfect.
How to tie a beautiful bow on a gift, you can find out in the next video.


